Pragmata gives you three upgrade tracks — suit stats, abilities, and gear/mod slots — and Upgrade Components to spend across all of them. Spread evenly and you'll hit a wall on Sector 2. Here's the order that matters, why, and which unlocks are non-negotiable before you leave the Shelter on each visit.
The Three Upgrade Surfaces
There are two machines at the Shelter you'll spend time at:
- Firmware Updater — raises suit-level stats (HP, defense), weapon damage, and Diana's hacking power. Costs Upgrade Components.
- Unit Printer — unlocks and levels abilities (Object Scan, Auto-Hack, Red Gate Keys, etc.) and mod slots. Costs Upgrade Components.
You'll unlock new nodes as you pick up REM chips and hand them to Diana. That's where the "new toy every Shelter visit" pacing comes from.
Early-Game Stat Priorities (Firmware Updater)
The suit has three baseline stats to pour into — HP, defense/damage resistance, and weapon/hack damage. The instinct is to rush damage. Don't.

Early-game order:
- HP first. Healing items (Repair Canisters) are rare in Sectors 1–2. Eating one bad hit on a 1,500 HP suit is survivable; on a 900 HP suit it's a reload. Push HP to the first or second breakpoint before anything else.
- Hacking damage second. Diana's hacking damage scales the blue numbers on every successful hack, which is 50%+ of your damage in Pragmata. This is the stat that makes a hacked enemy die, not linger.
- Weapon damage third. Only affects your attack-slot weapons (the yellow pickup slot) — not the Grip Gun. It's real, but it's narrower than the other two.
After the first couple visits you can distribute roughly evenly. But in the first three hours, HP is the lever that stops you reloading.
Ability Priorities (Unit Printer)
Most new players get this wrong. The "Abilities" tab is where the game's quality-of-life lives, and two unlocks are worth more than anything else you'll buy early.
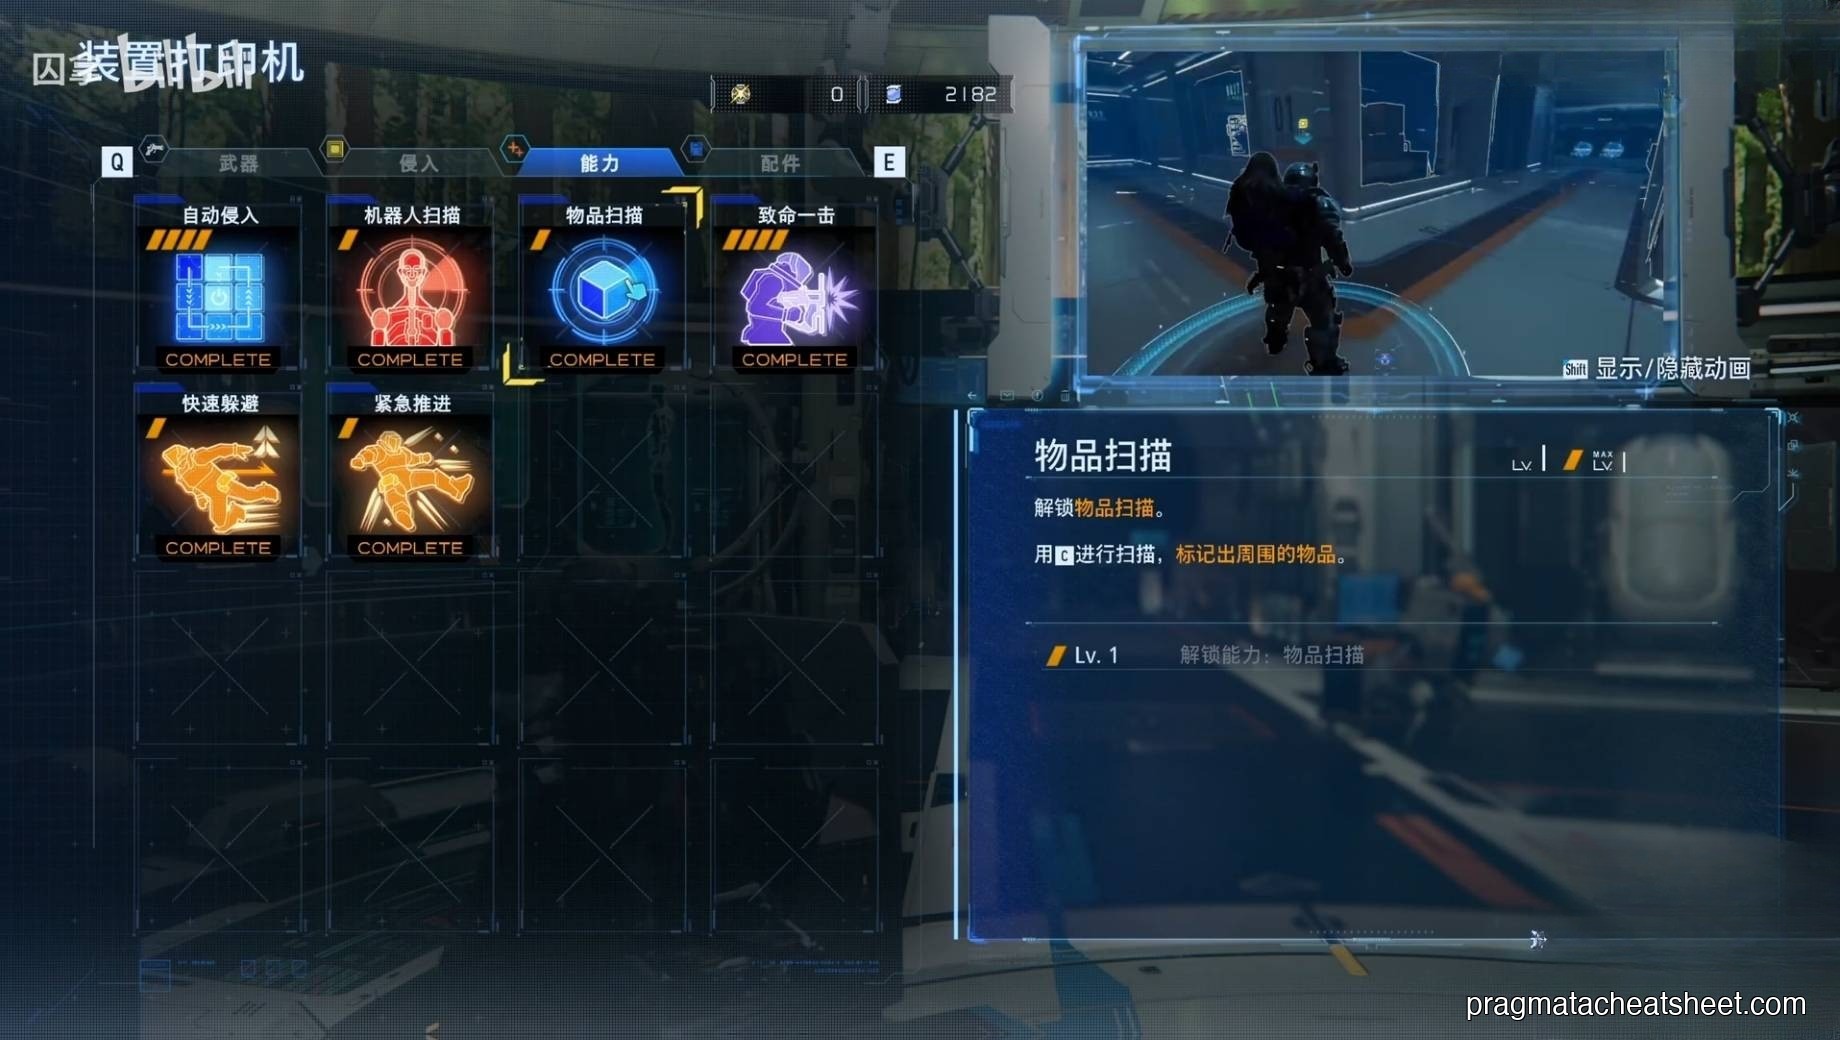
Tier S — unlock as soon as possible
- Object Scan — highlights interactables and collectible props in a room. Without it, you'll walk past half the Lunafilament stashes in Sector 1. Unlock at your first chance.
- Auto-Hack — lets Diana complete basic hacks (doors, panels, simple enemies) without manual grid input. Frees your attention for the grid battles that matter.
- Weak-Point Critical — a damage multiplier on precision hits during OPEN State. Pairs with every other thing in this guide.
Tier A — grab soon after
- Red Gate Keys (unlock ability line) — not the keys themselves, but the ability that lets Diana carry and use them. Red Zones are where Pure Lunum and Sector-specific rare drops live.
Tier B — cosmetic / flexibility
- Additional dodge upgrades, emergency dash. Nice, not essential. Grab once you've got the S-tier stack.
Gear / Mod Slots
The third tab is where your Mod Slots and Storage Expander live — and these punch above their weight early.
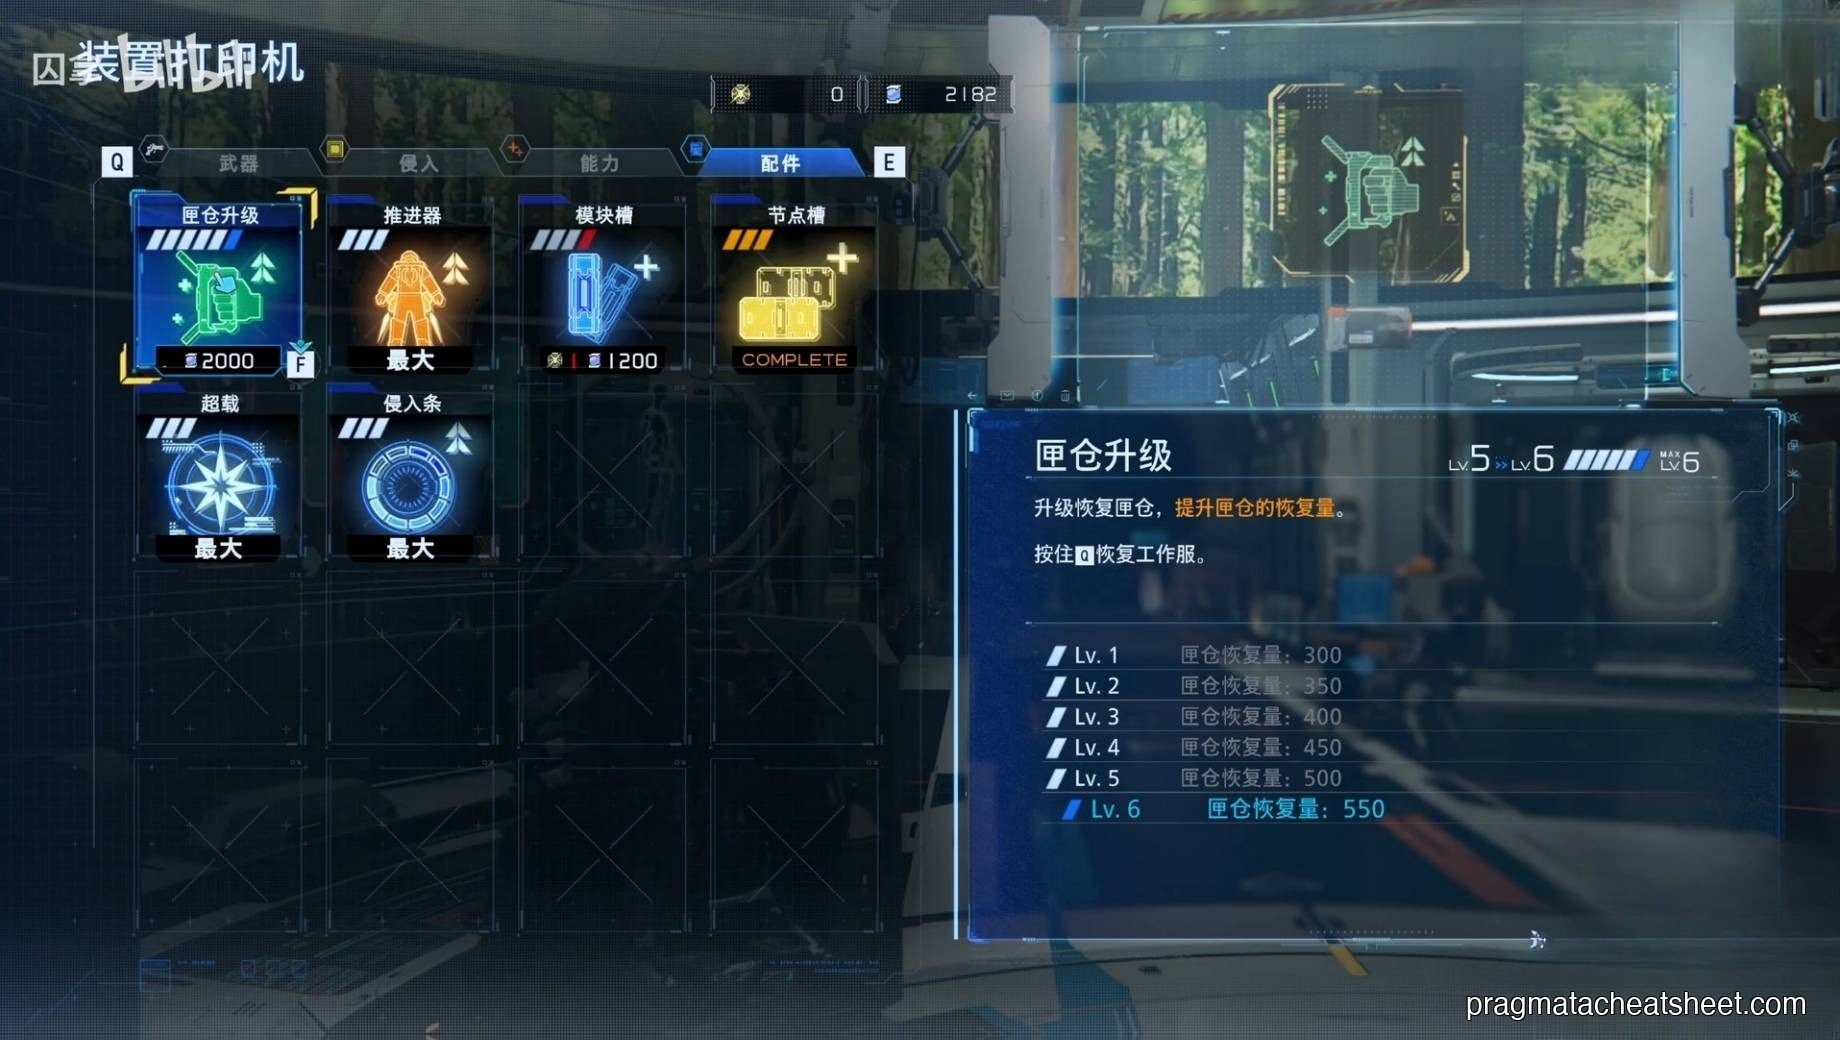
- Node Slots (expanding your weapon's mod capacity) — every extra slot is another passive bonus stacked on the weapons you already own. The ROI compounds across every fight for the rest of the run.
- Storage Expander — raises the cap on Repair Canisters you can carry. Directly closes the "ran out of heals in Sector 2" hole that kills new saves.
Invest here before you dump Components into weapon-damage lines. A mod-slot upgrade applied to your best weapon gives you more effective damage than two levels of raw weapon damage.
Weapons & Hacking Lines (Lower Priority)
The Weapon and Hacking upgrade lines are deeper pockets — they scale well once the above is solid. Early on they're inefficient.
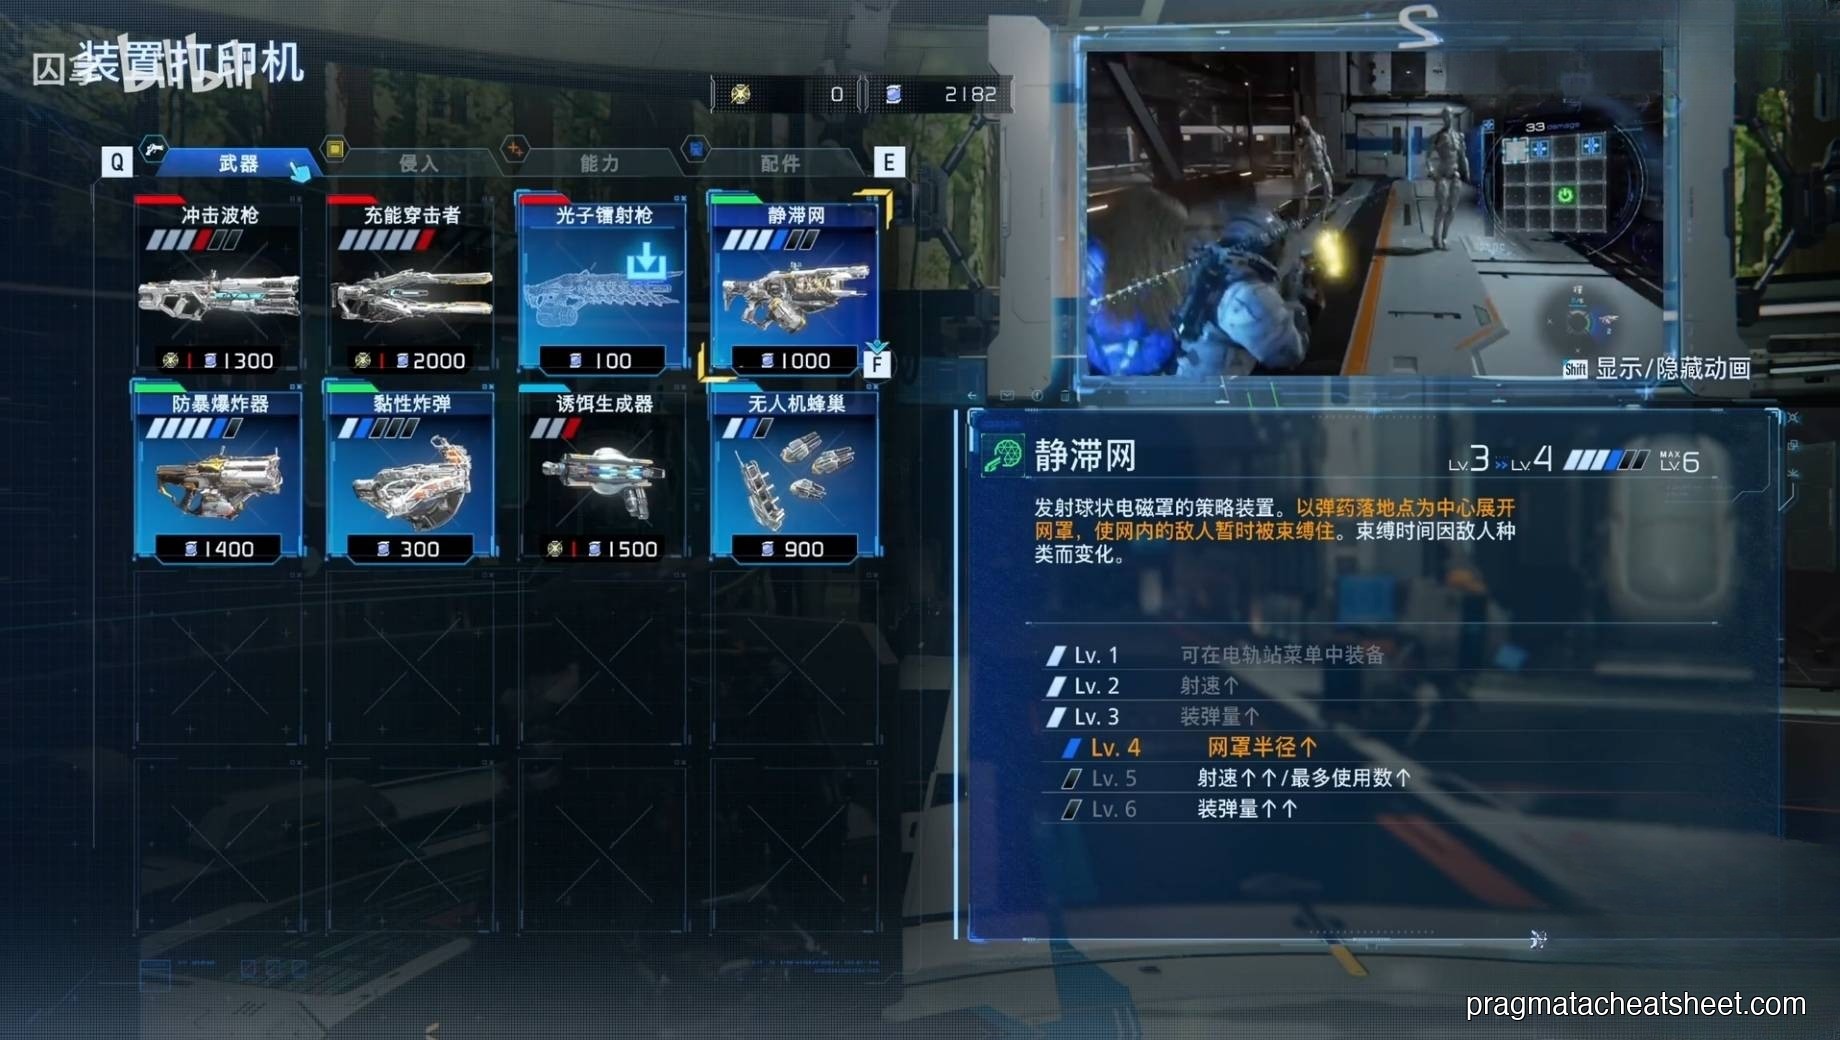
Why: individual weapon upgrades only help when that weapon is equipped (or for pickup weapons, in that single magazine). A generic Hacking Damage stat on the Firmware Updater is almost always a better Component spend than "+2 damage on Pulse Carbine" early on.
Come back to these when:
- You've decided on a main attack-slot weapon (late Sector 2 / early Sector 3).
- You've maxed HP and Hacking Damage to the first major breakpoint.
- You're prepping for a boss whose weakness matches one specific weapon.
Red Gate Keys — The Non-Obvious Early Unlock
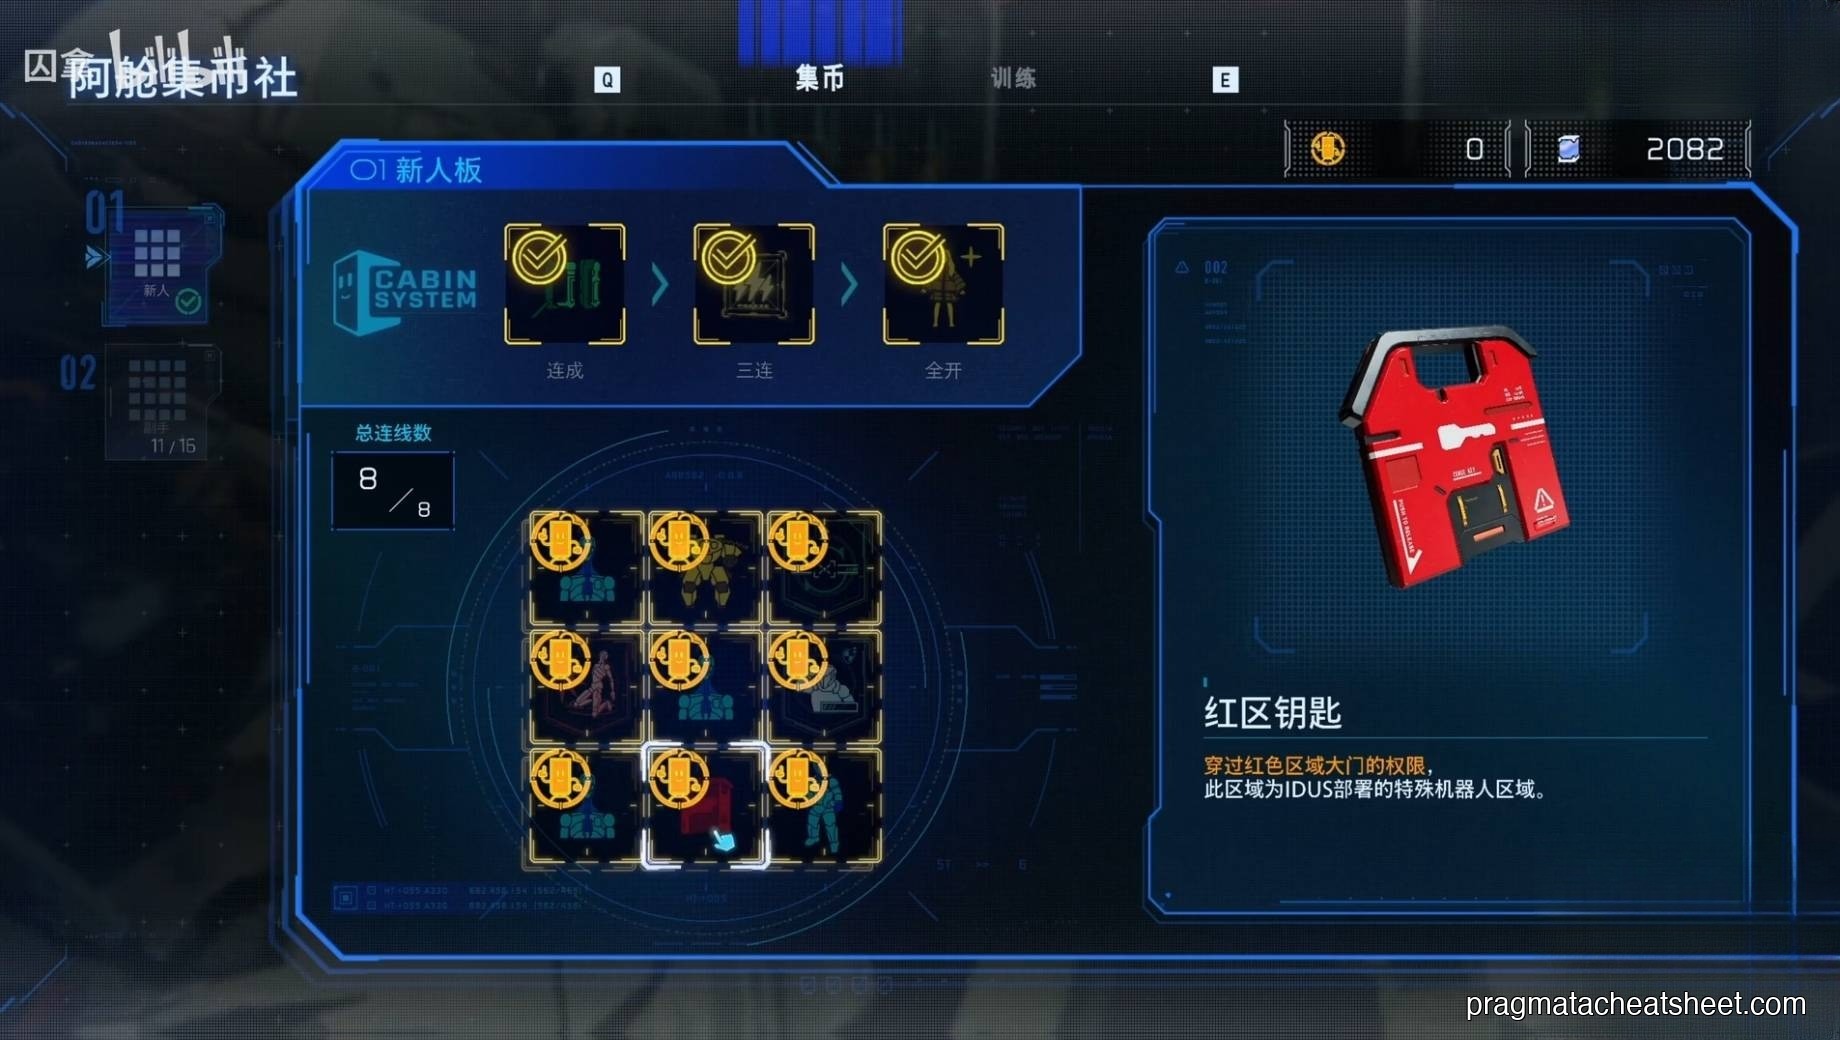
Once the Red Gate Key ability is unlocked, start watching for Red Zones in every Sector. They hide Pure Lunum, rare mods, and collectibles you can't access any other way. Buying one or two Red Gate Keys early at the Cabin Stamp Club is the highest-EV first-visit purchase.
"Linked Collection Items"
Some collectibles chain: scan item A, then you can interact with item B nearby for a bonus reward. This is most visible once Object Scan is unlocked — follow the chain. Skipping them leaves tier-1 Components on the table.
Getting More Upgrade Components
Components drip in from three main streams:
- Exploration. Every Sector has component caches, usually near environmental hack panels. Object Scan is how you find them all.
- Pure Lunum refinement. Pure Lunum chunks trade up into Components at the Shelter — this is why Red Gate Keys compound so hard.
- REM chips → Diana gifts. Every REM chip handed to Diana unlocks new printables; some of those nodes rebate Components when leveled.
If you're stuck on Components mid-Sector, the fastest catch-up is: sweep back through previous Sectors with Object Scan active, Red Gate Key in hand, and Cleanse ready.
The Skill-Order TL;DR
- HP → breakpoint 1.
- Object Scan + Auto-Hack + Weak-Point Critical.
- Storage Expander + one or two Node Slots on your favorite weapon.
- Hacking Damage.
- Red Gate Keys ability unlock.
- Now start looking at weapon-specific upgrade lines.
Do that order and you'll walk into Sector 3 with an actual kit, not a spread-too-thin mess.