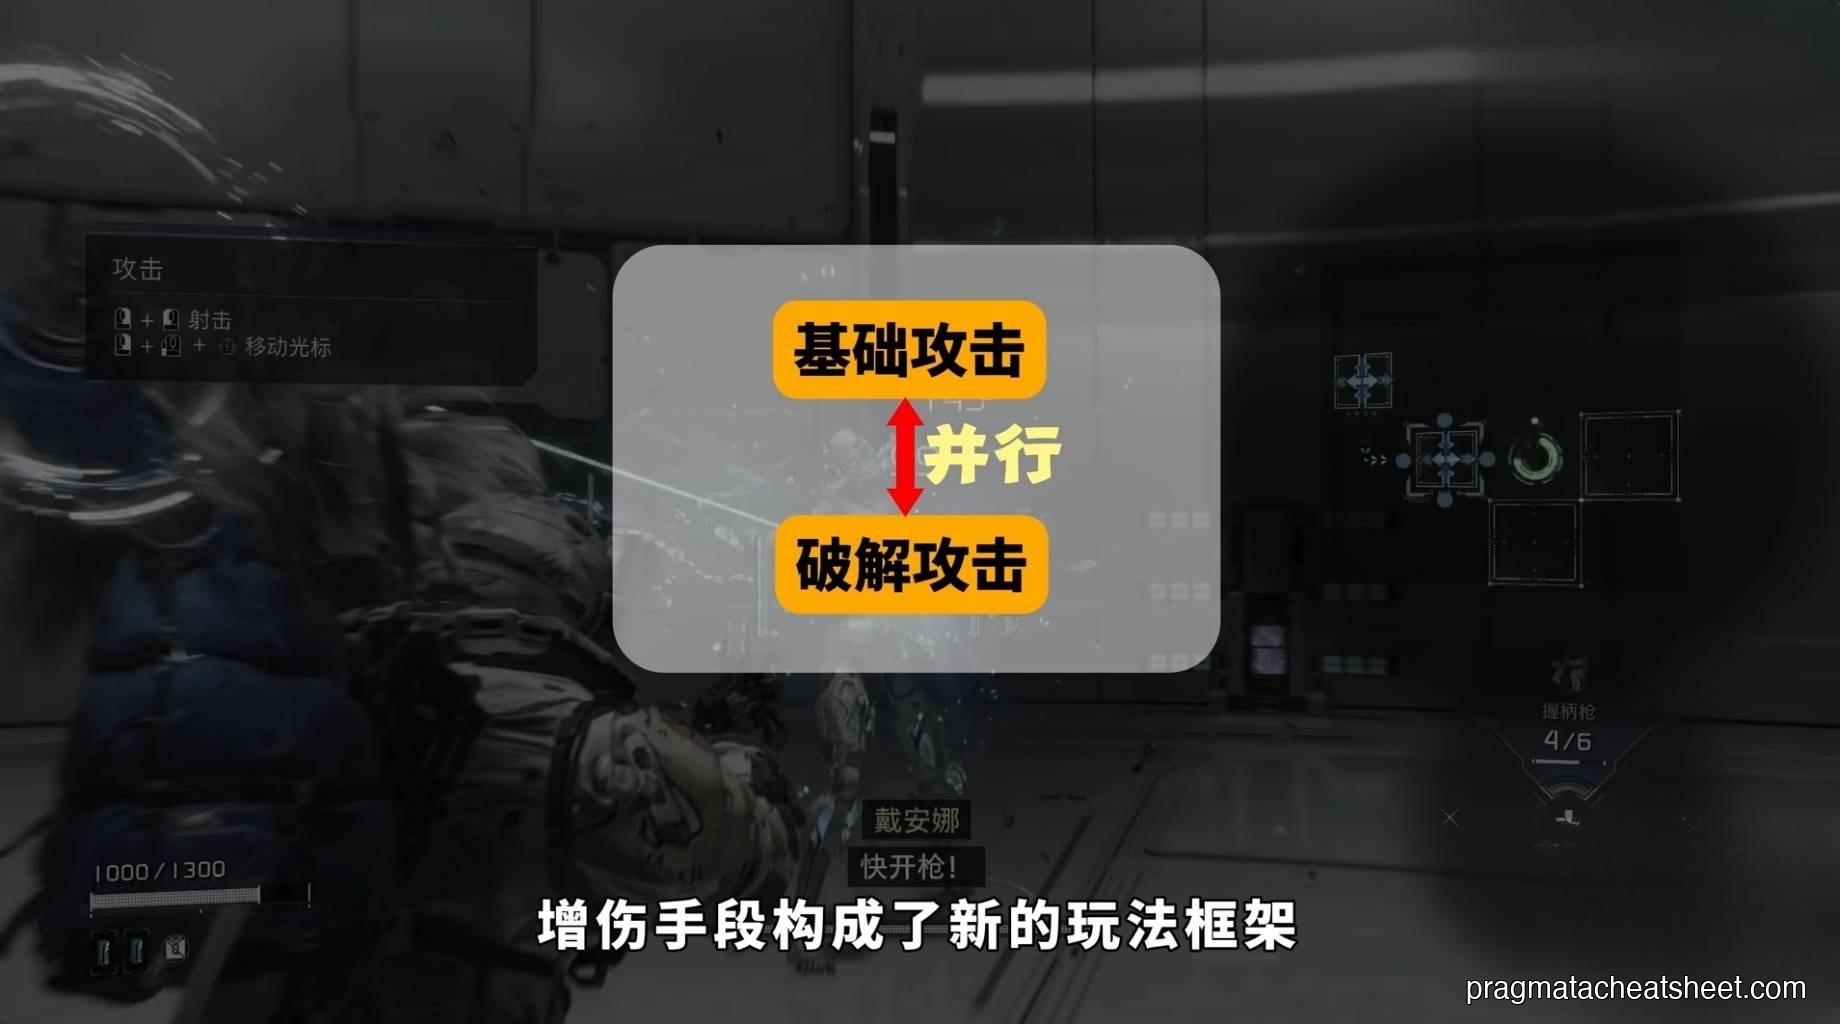
Pragmata is a shooter with a puzzle hooked onto every trigger pull. You aim, Diana opens a hacking grid, you trace a path, and the enemy briefly falls apart at the seams — that's the window you shoot into. Get that loop right and the rest of the game opens up. Miss it, and even a basic combat bot will grind you down.
The Core Loop
Every serious fight in Pragmata follows the same three-beat rhythm:
- Aim at an enemy — a hacking grid appears on the right side of the reticle.
- Hack by tracing a path from the entry square to the green goal node. Completion lands a burst of hacking damage and drops the enemy into OPEN State.
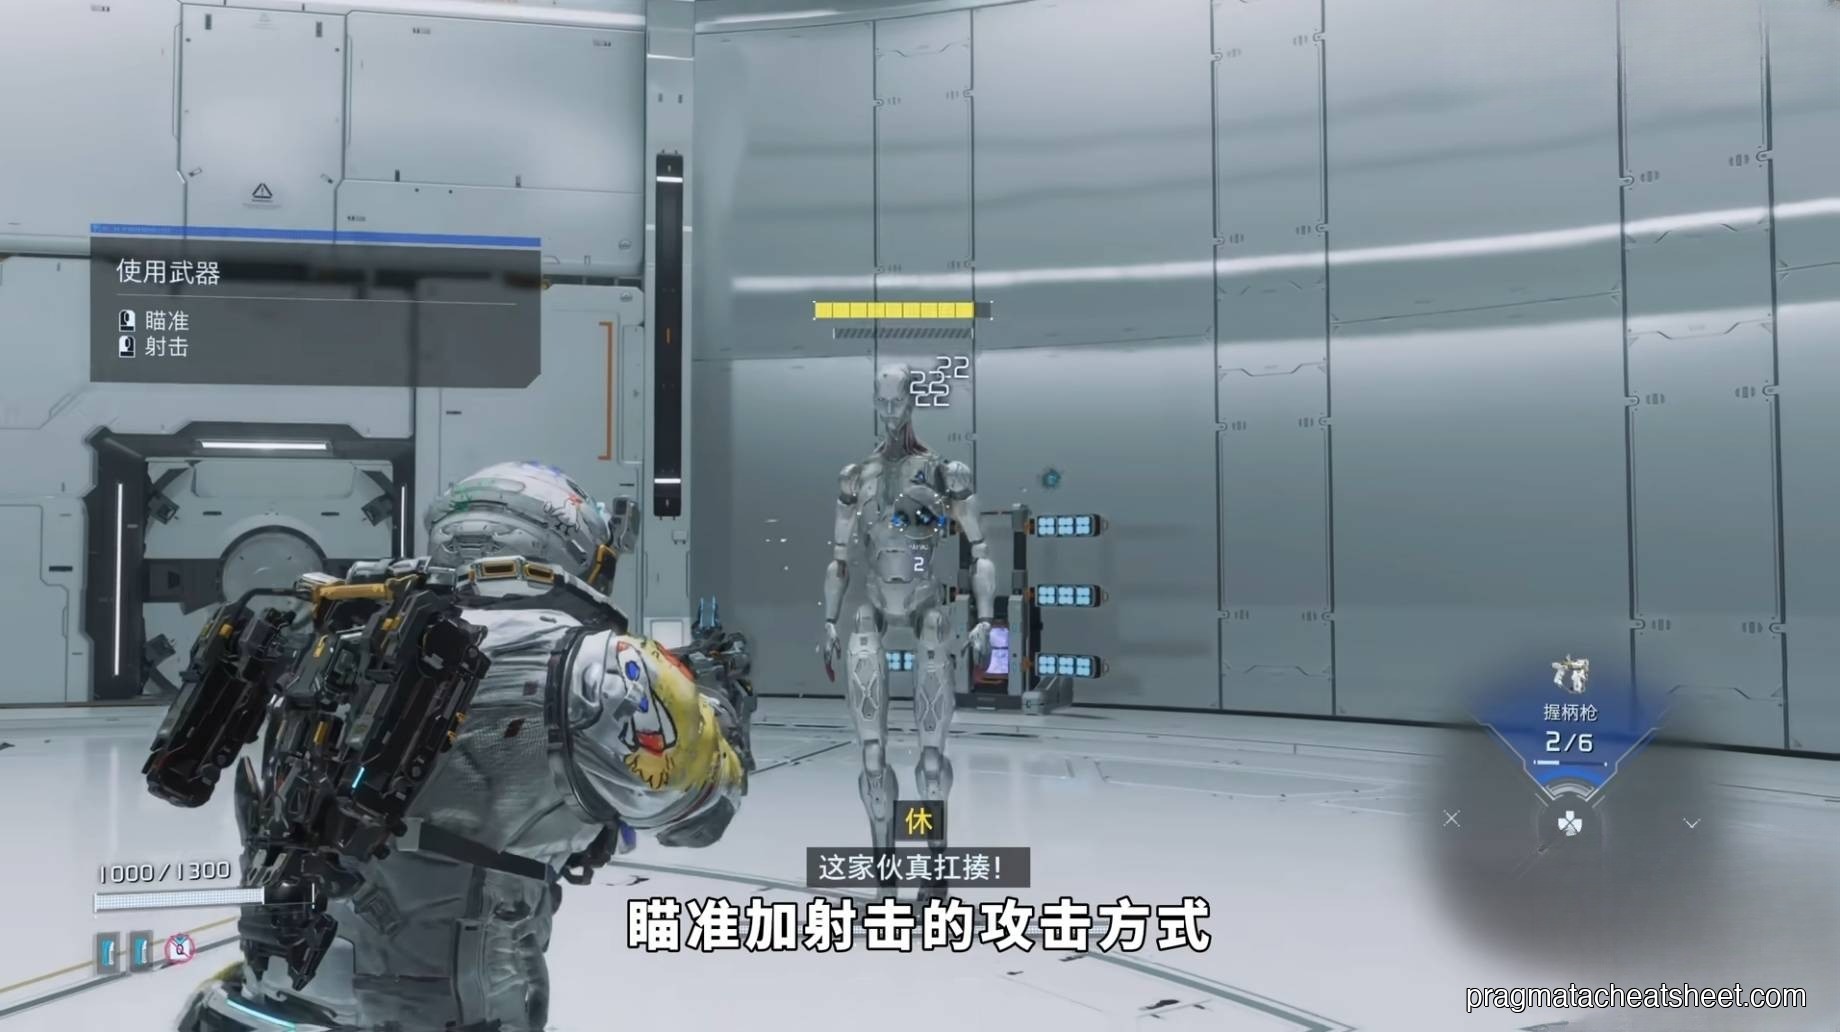
- Shoot during OPEN State. Your gunfire does massively more damage while the enemy is compromised.
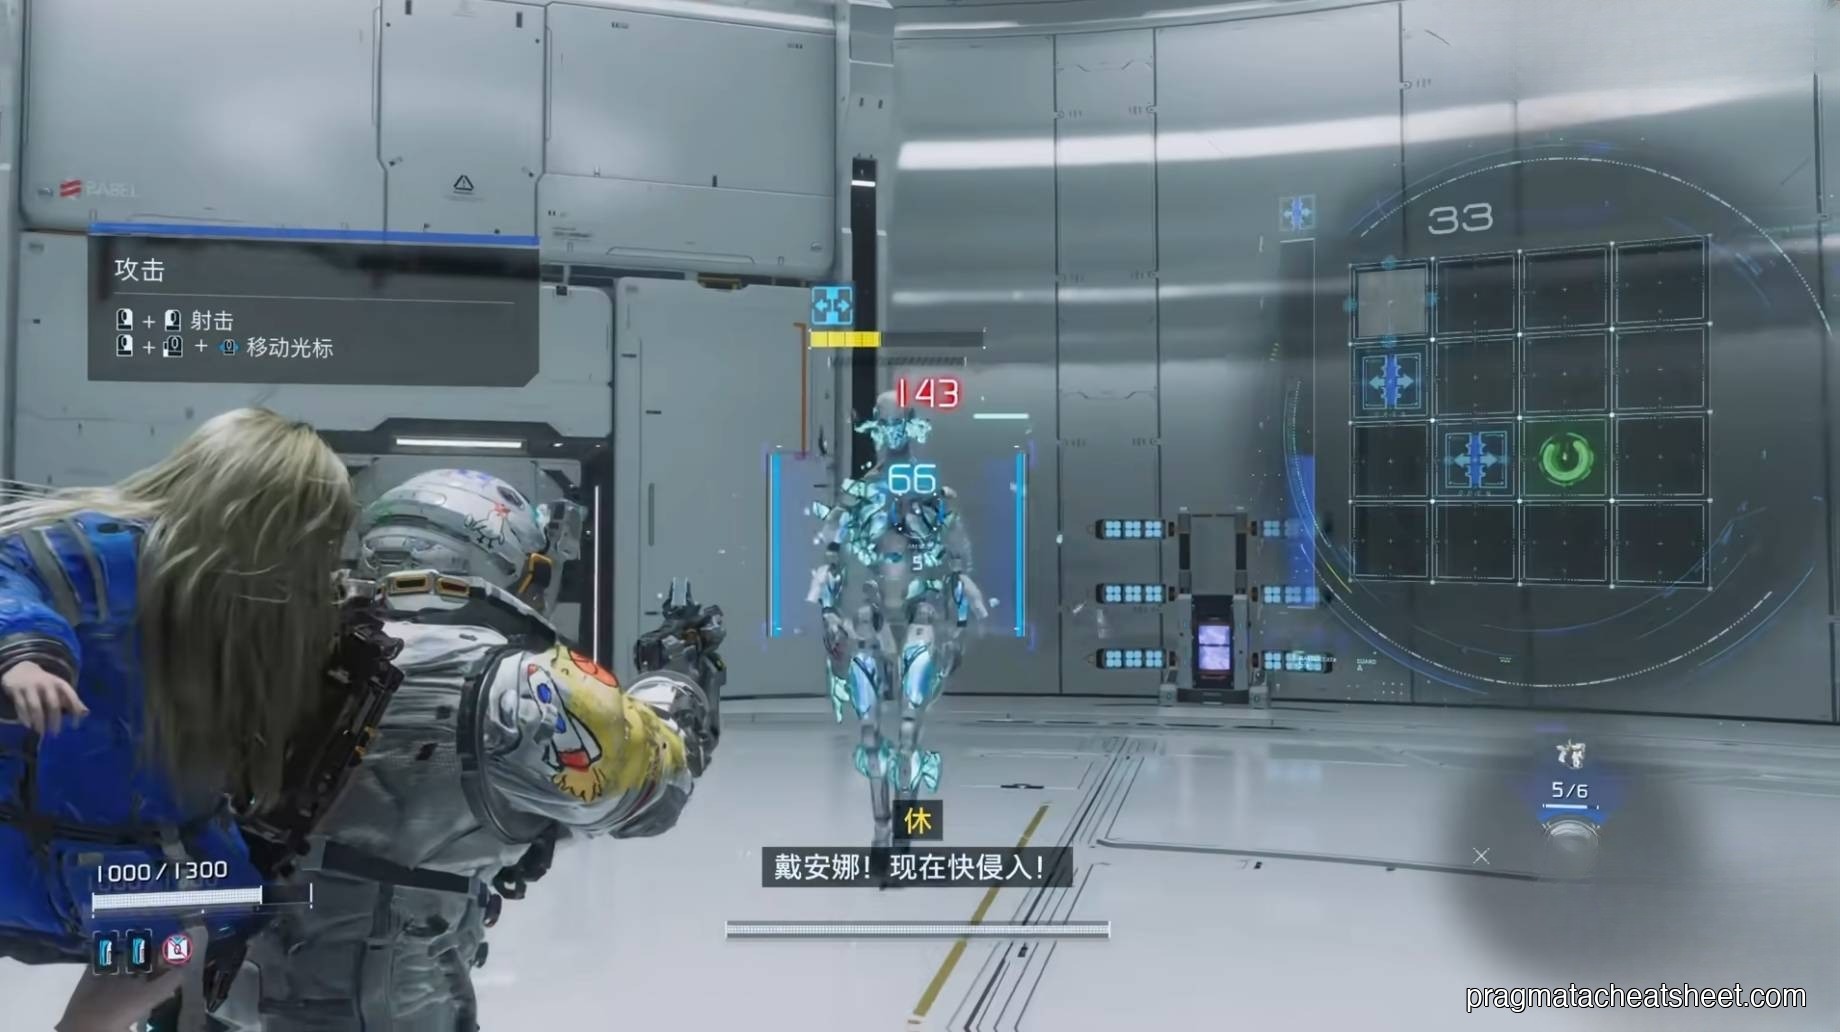
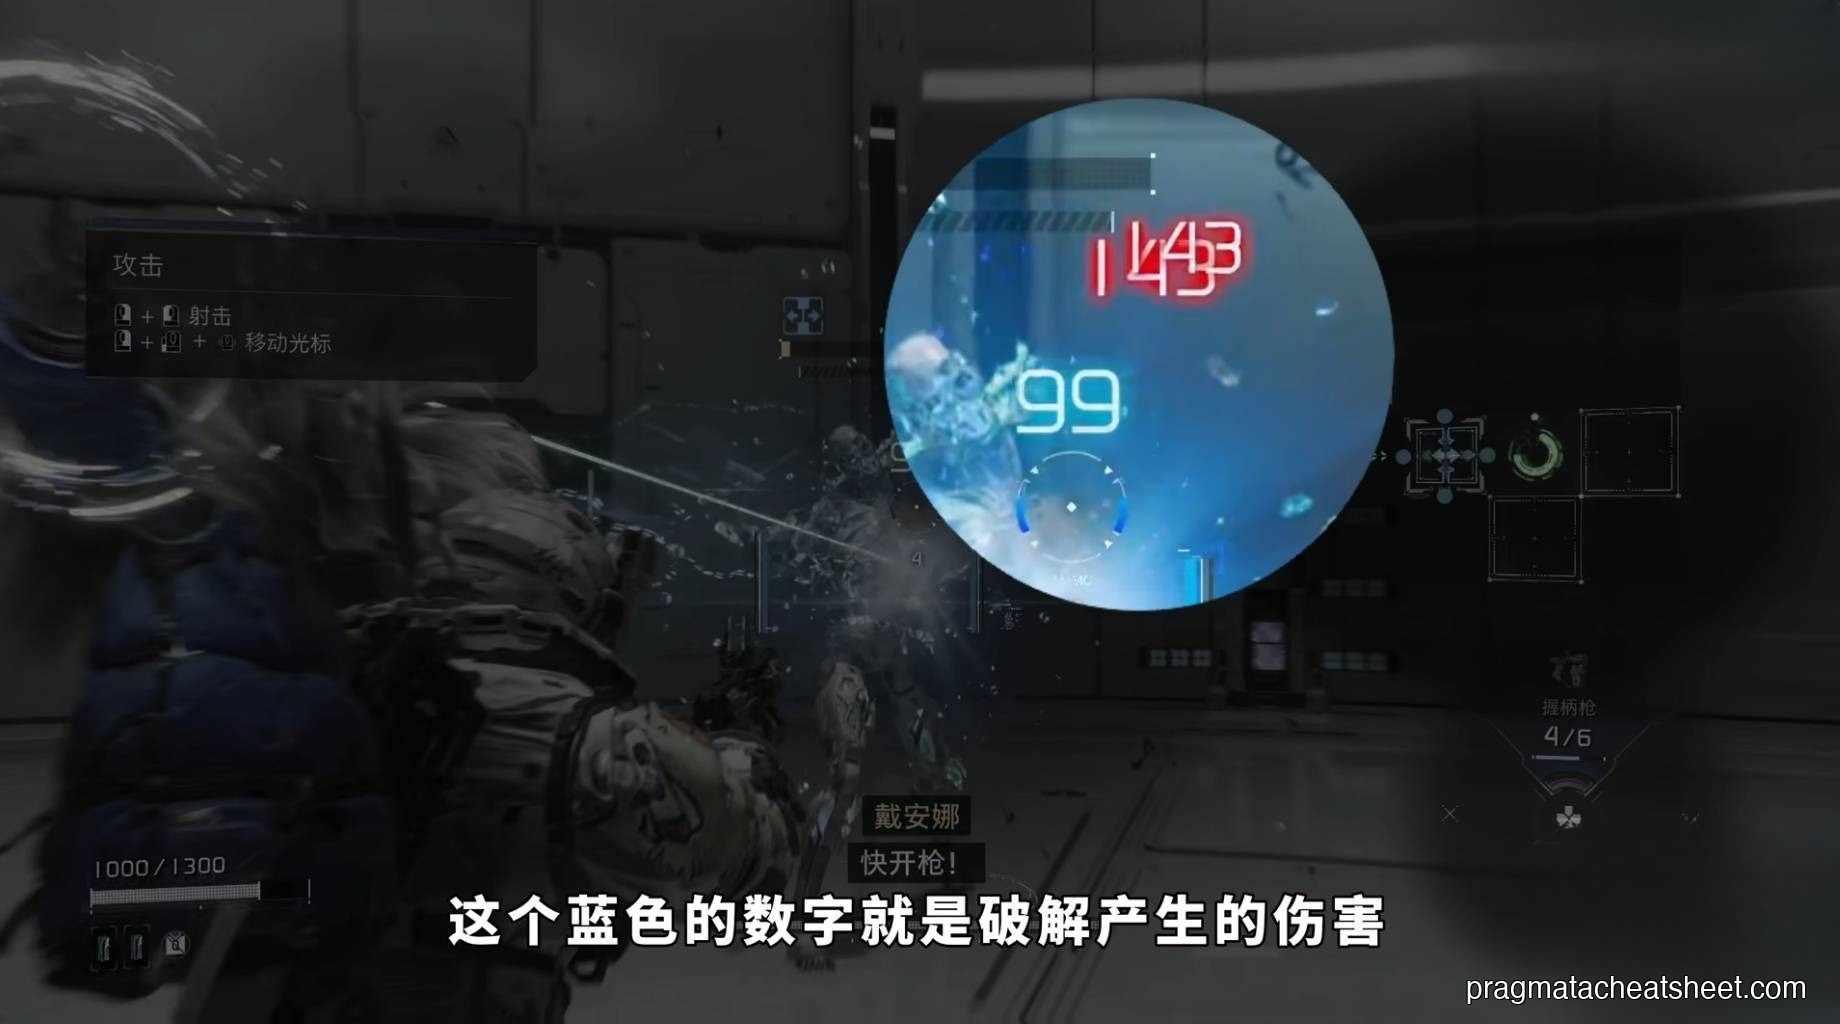
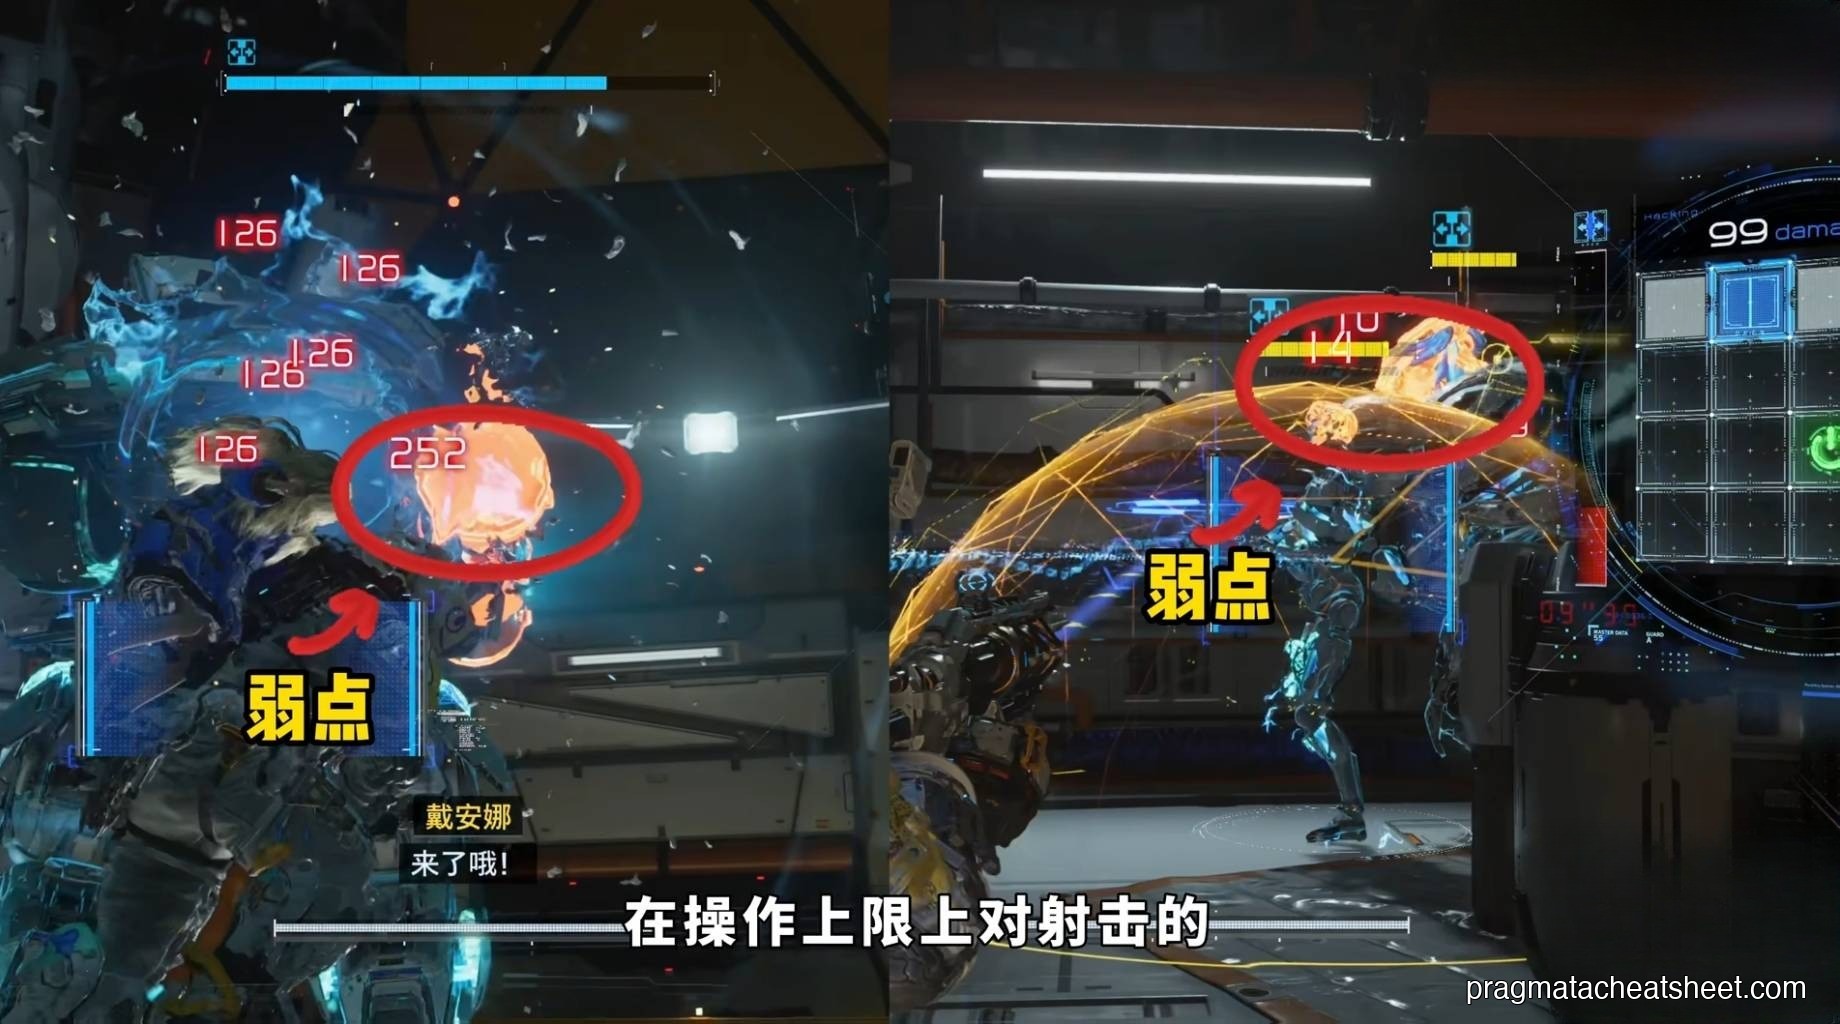
Hacking damage shows up as blue numbers. The red numbers that follow are your gun damage, amplified by the broken-open state. Both matter — you want the blue number tall (better path), and the red number to land (don't fumble the shot after the hack).
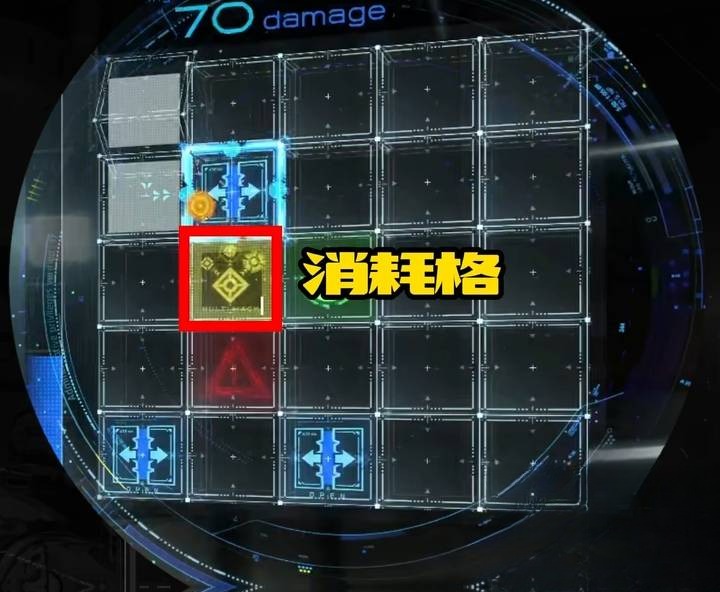
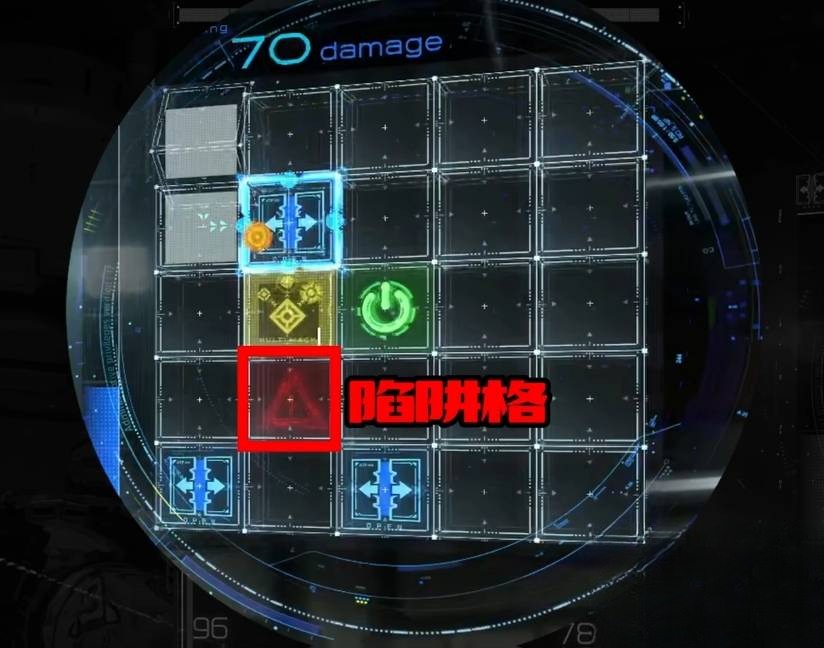
The Hacking Grid
When you aim, the grid appears. Your cursor starts on the blank entry square and you move it through connected cells toward the power-button icon — the Green Node — to complete the hack.
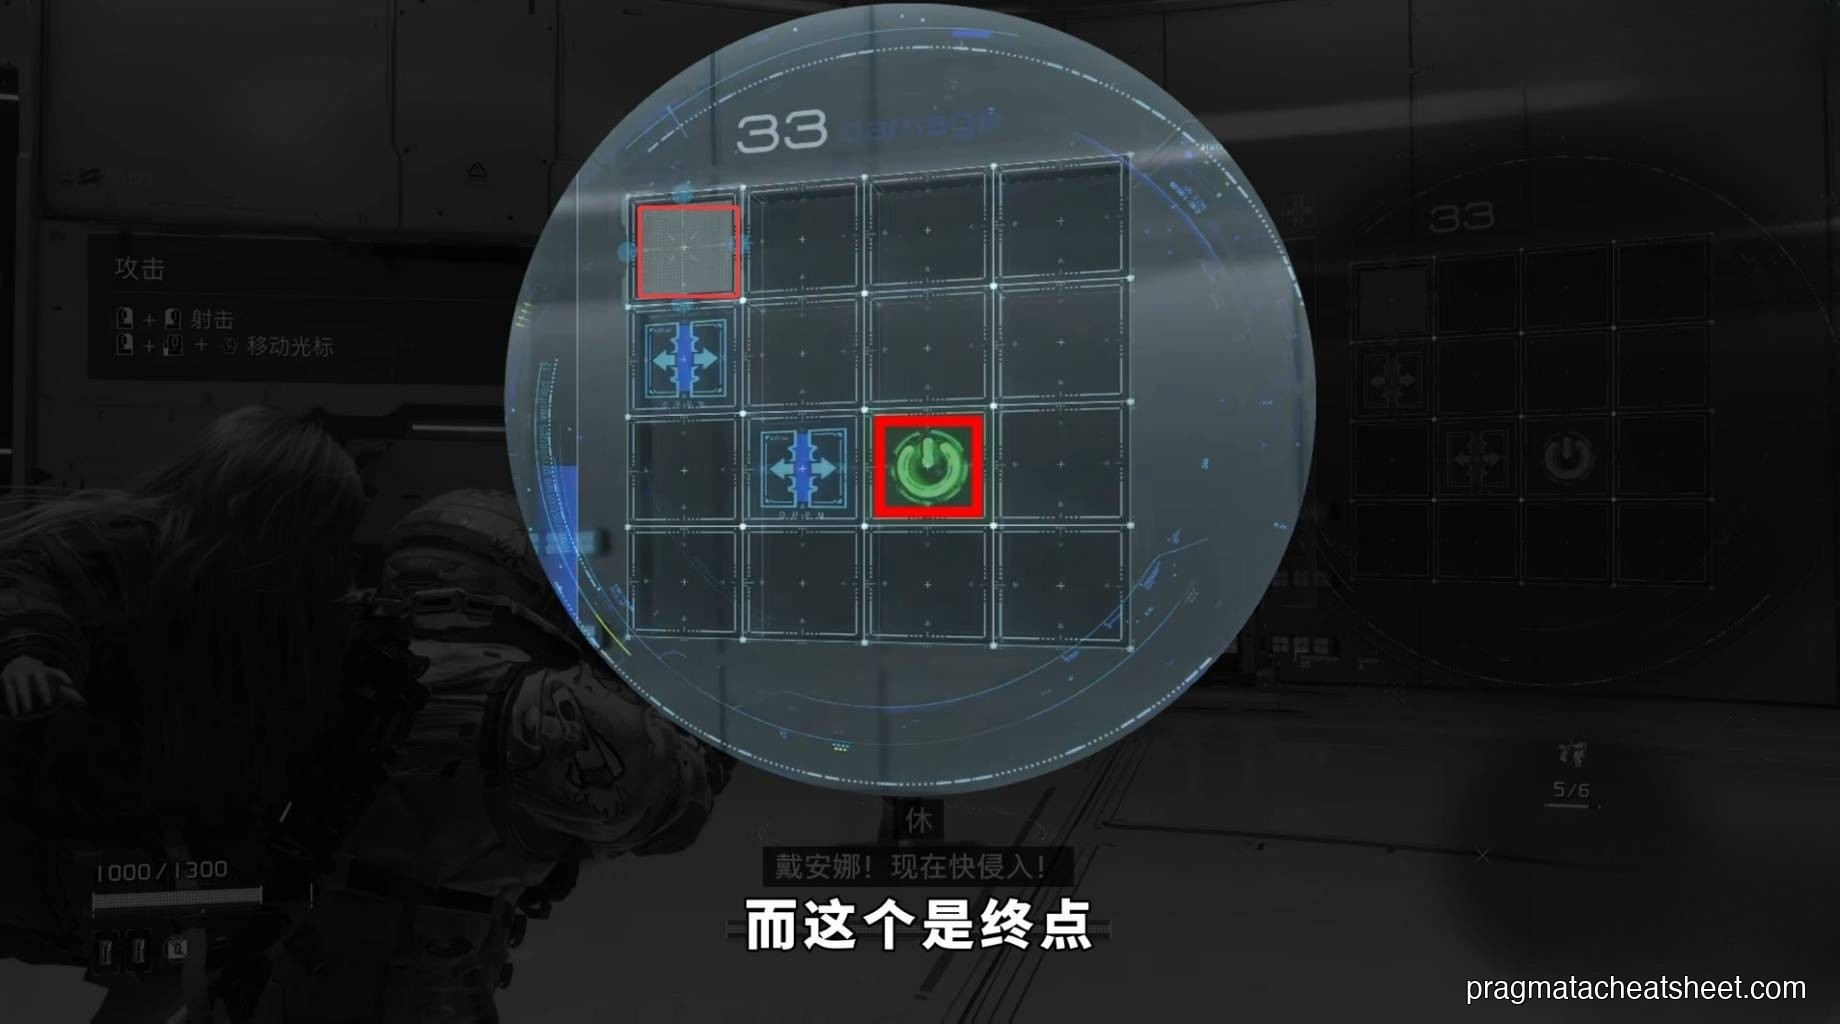
The cells aren't all the same. The four colors matter:
- Blue Node — damage cells. The more blue nodes your path crosses, the bigger the hacking damage and OPEN State amplifier.
- Green Node — the goal. Reaching it ends and commits the hack.
- Yellow Hacking Node — consumable buffs. Spend a collected item and these convert into timed bonuses (extra damage windows, longer stuns, etc.). Limited uses, so save them for beefy targets.
- Red Node — trap. Touching one cancels the hack outright. Sometimes gray blocker cells do the same thing.
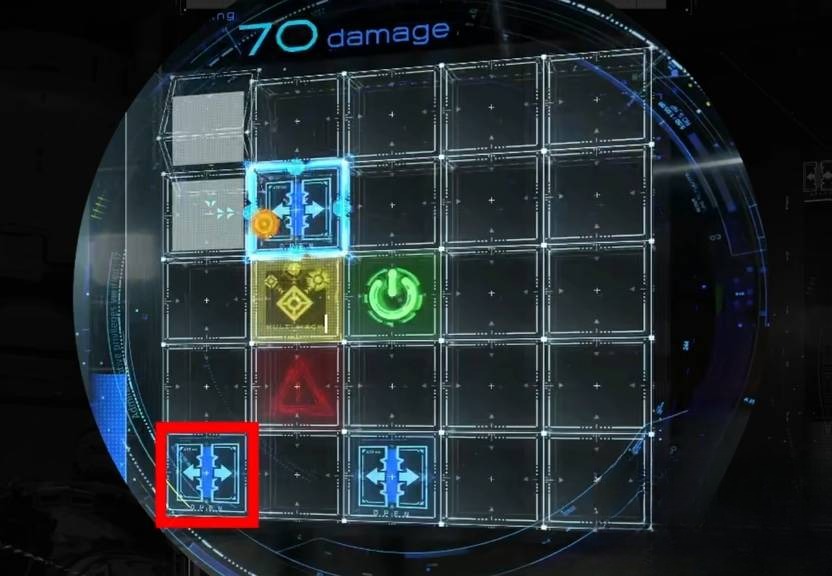
The takeaway: the "optimal" route is almost never the shortest one. It's the one that chains the most blue nodes (and the occasional yellow) on the way to green, while routing around red.
Grid Size Scales with the Target
Different enemies have different grid sizes. A trash mob pops up with a tiny 3×3 panel you can solve in under a second. Mini-bosses and Sector Guards open gigantic boards with more branches, more traps, and more reward cells.
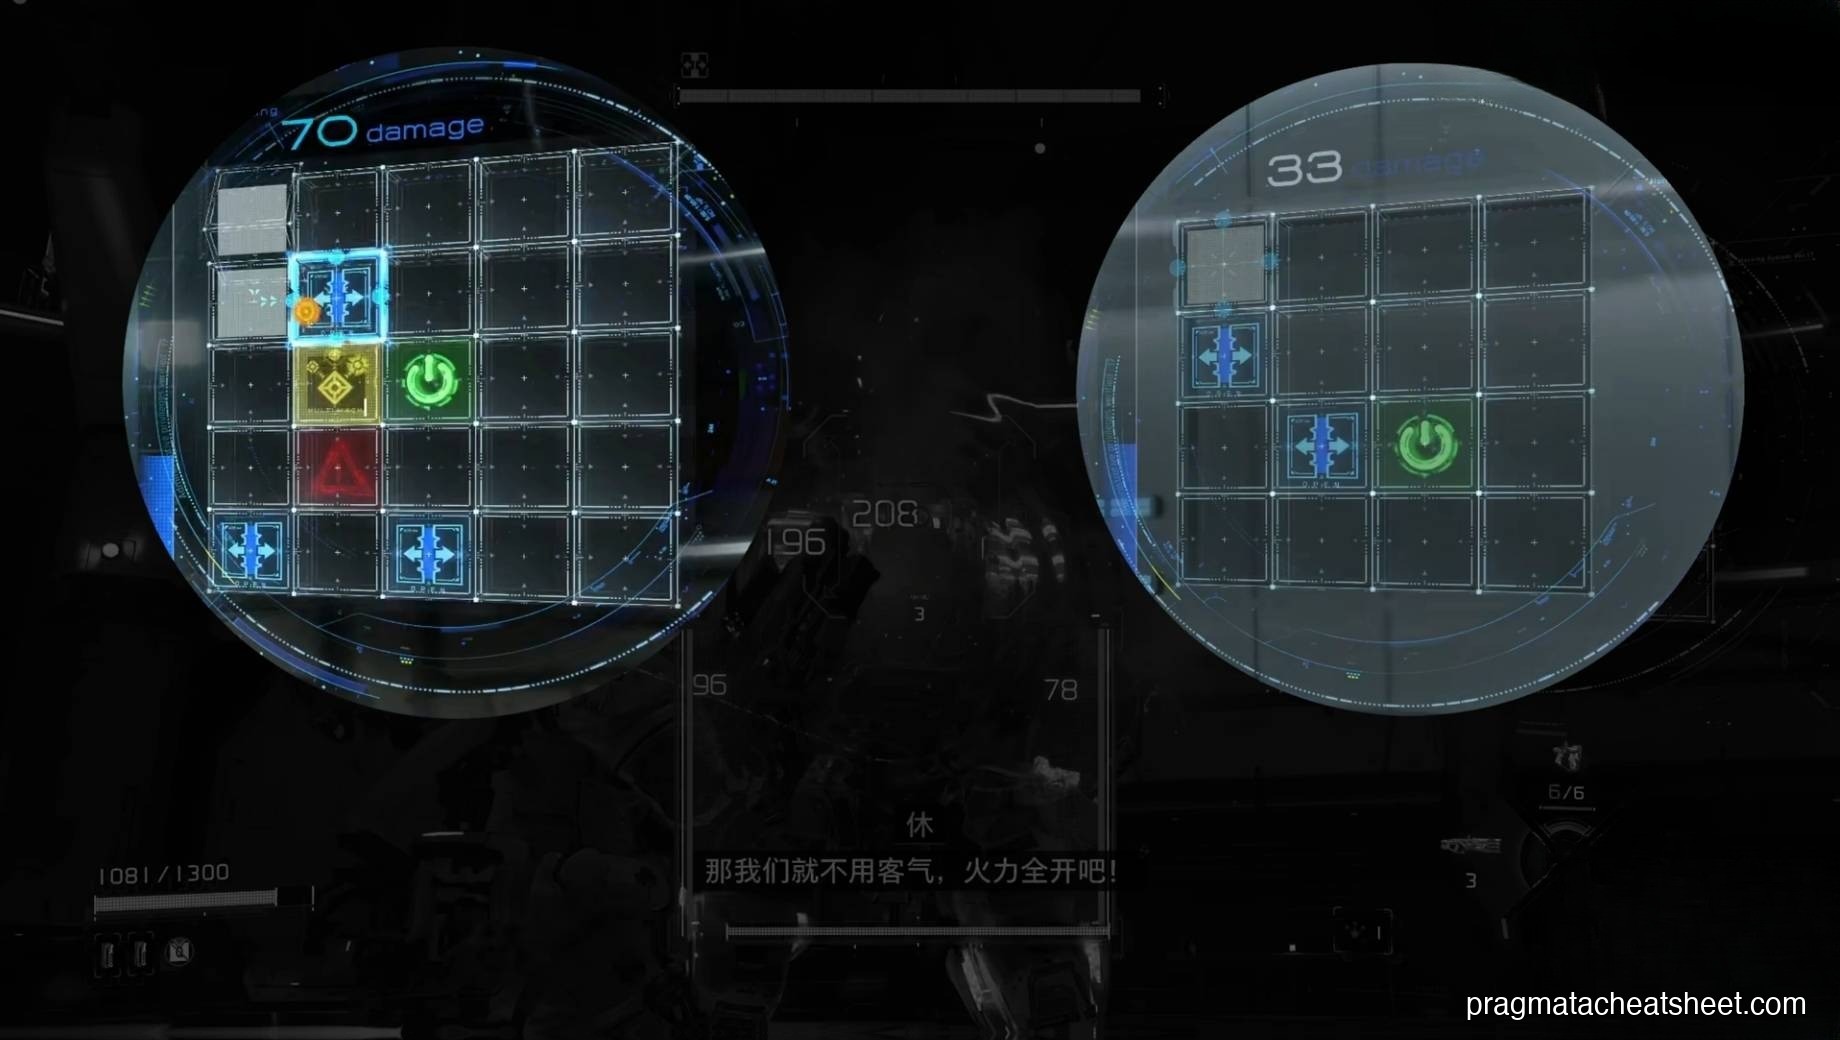
Bigger target = bigger hack = more damage, but also more failure points. Learn to read the grid at a glance so you can trace a clean route before the enemy windows close.
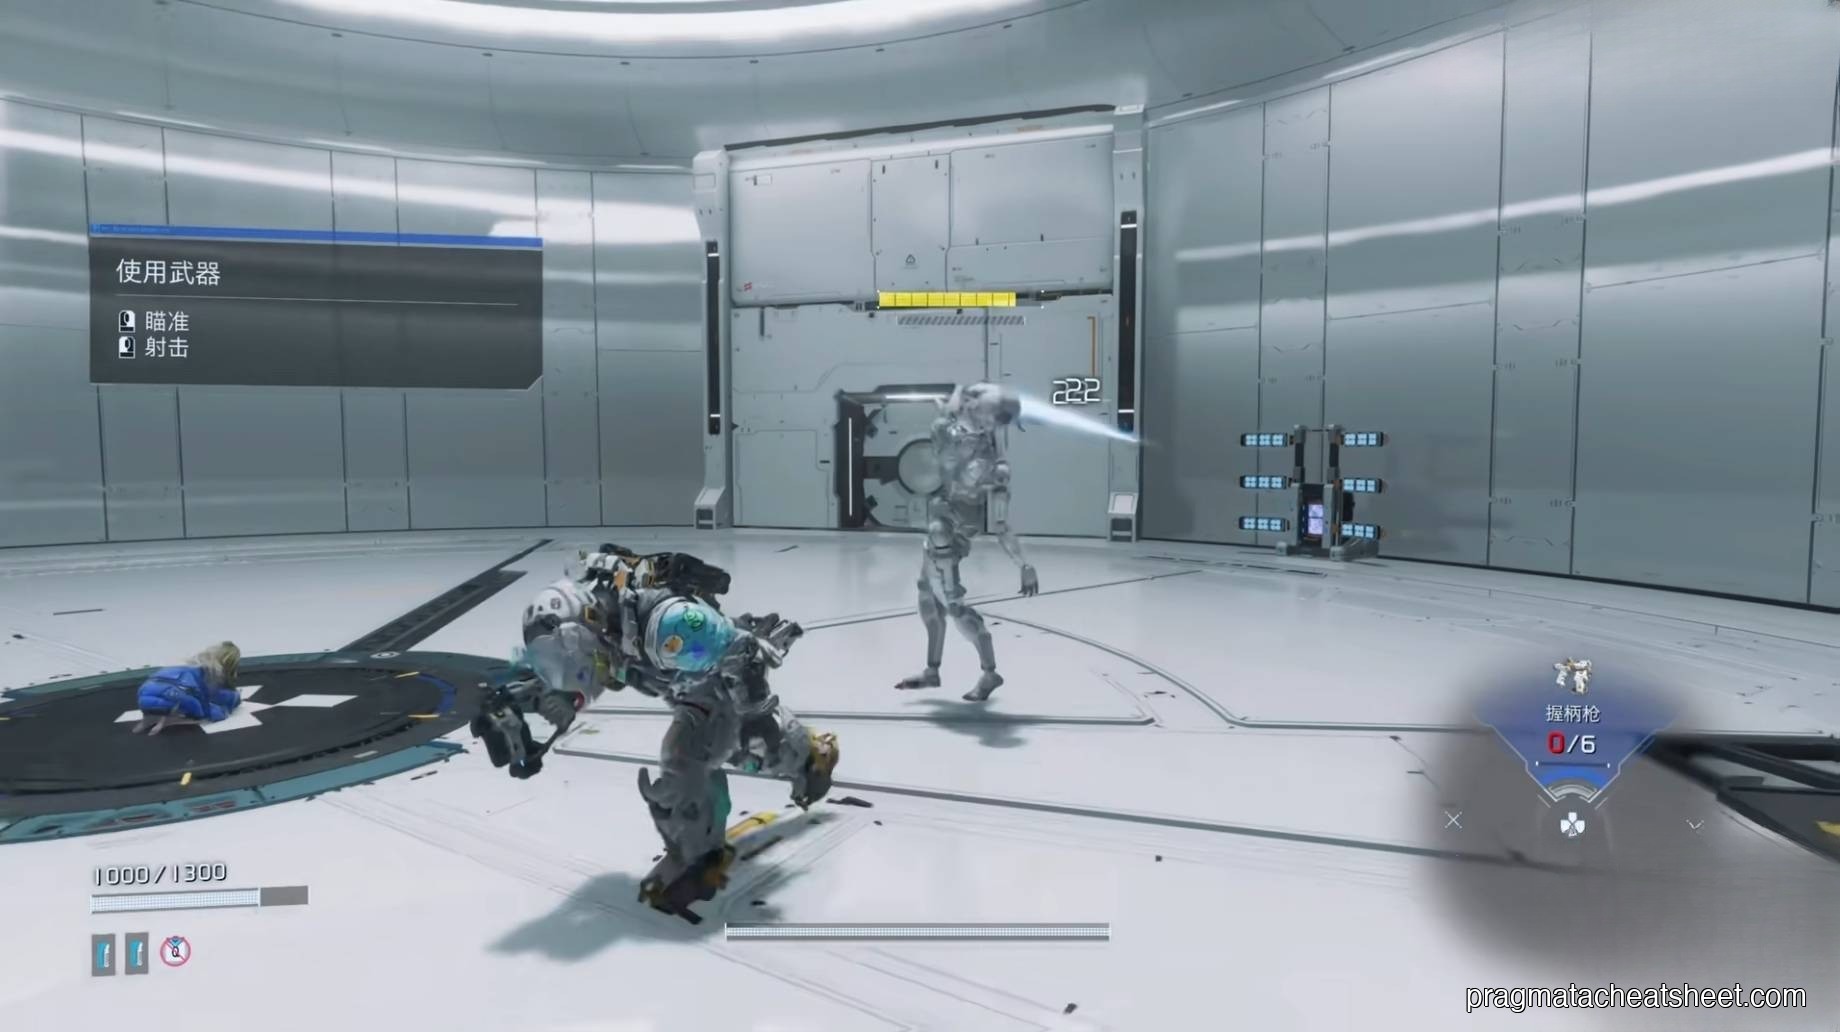
Weapons & Weak Points
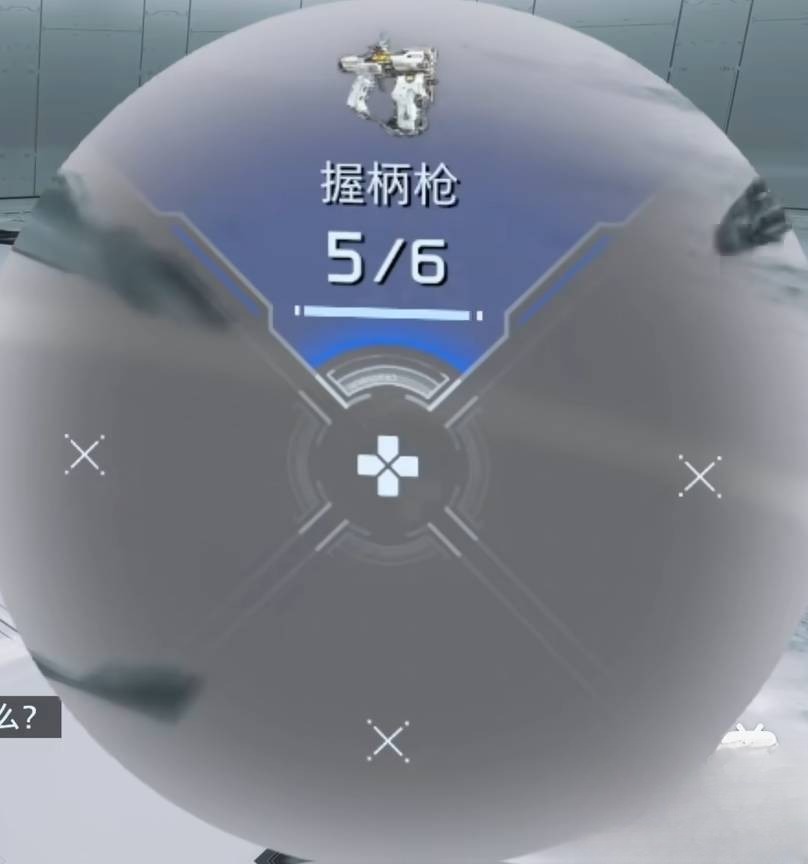
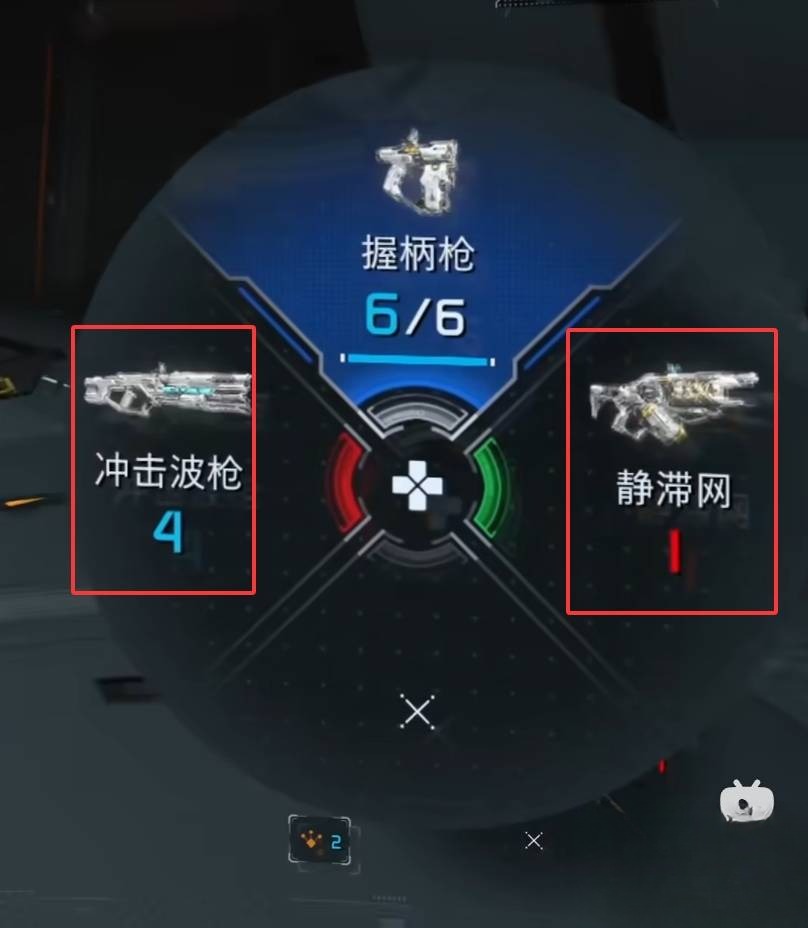
Your starter is the Grip Gun, a charge-based sidearm with auto-refilling ammo — it's your bread-and-butter between hacks.
Every other weapon is a pickup. Once you burn the magazine, it's gone, so treat field weapons like opportunities, not kits: pick up Photon Laser, Charge Piercer, or Shockwave Blaster when you see them, and fire them during OPEN State for the biggest return.
Enemies have weak points the game doesn't highlight loudly. You need the accuracy to hit them — fire from cover, aim for the glowing joint, helmet slit, or back panel. OPEN State + weak-point shot is where the true damage spikes come from.
Defense: Dodge, Don't Tank
There's no shield button. Evasion is your panic move — a dodge roll that cancels most recovery animations. Use it to break line of sight, reposition around cover, and stall for your next hack attempt.
Default aim-and-shoot alone is weak. Dodge-and-hack is the real defensive rhythm.
The Whole System Together
The hacking grid plus your weapons plus enemy weak points is the game's combat language. Fights are puzzles: which enemy do I hack first, which weapon do I unload during OPEN State, and where is my dodge-out path if the hack fails?
Tips for Early Combat
- Never shoot without hacking first. Unhacked enemies eat bullets. Your damage per magazine triples the moment OPEN State is up.
- Prioritize blue-heavy paths over fast paths. A three-cell straight line to green is a rookie mistake when a five-cell blue route exists.
- Save yellow nodes for mini-bosses. Burning consumables on trash mobs is a bad trade.
- Dodge through fire, not away from it. Rolling through a volley gives you frame advantage; backing up gives the enemy free tracking time.
- Pick up Photon Laser & Charge Piercer when you see them. They're your OPEN-State delete buttons.