The hack isn't a minigame wedged into a shooter — it's the shooter. Every fight in Pragmata is decided by how well you read Diana's grid, which nodes you touch, and what window you create for your next magazine. This page goes beyond the tutorial: node-by-node reading, how to think about Overdrive Protocol, and the habits that let you hack through a boss's healthbar instead of praying.
What's Actually Happening When You Hack
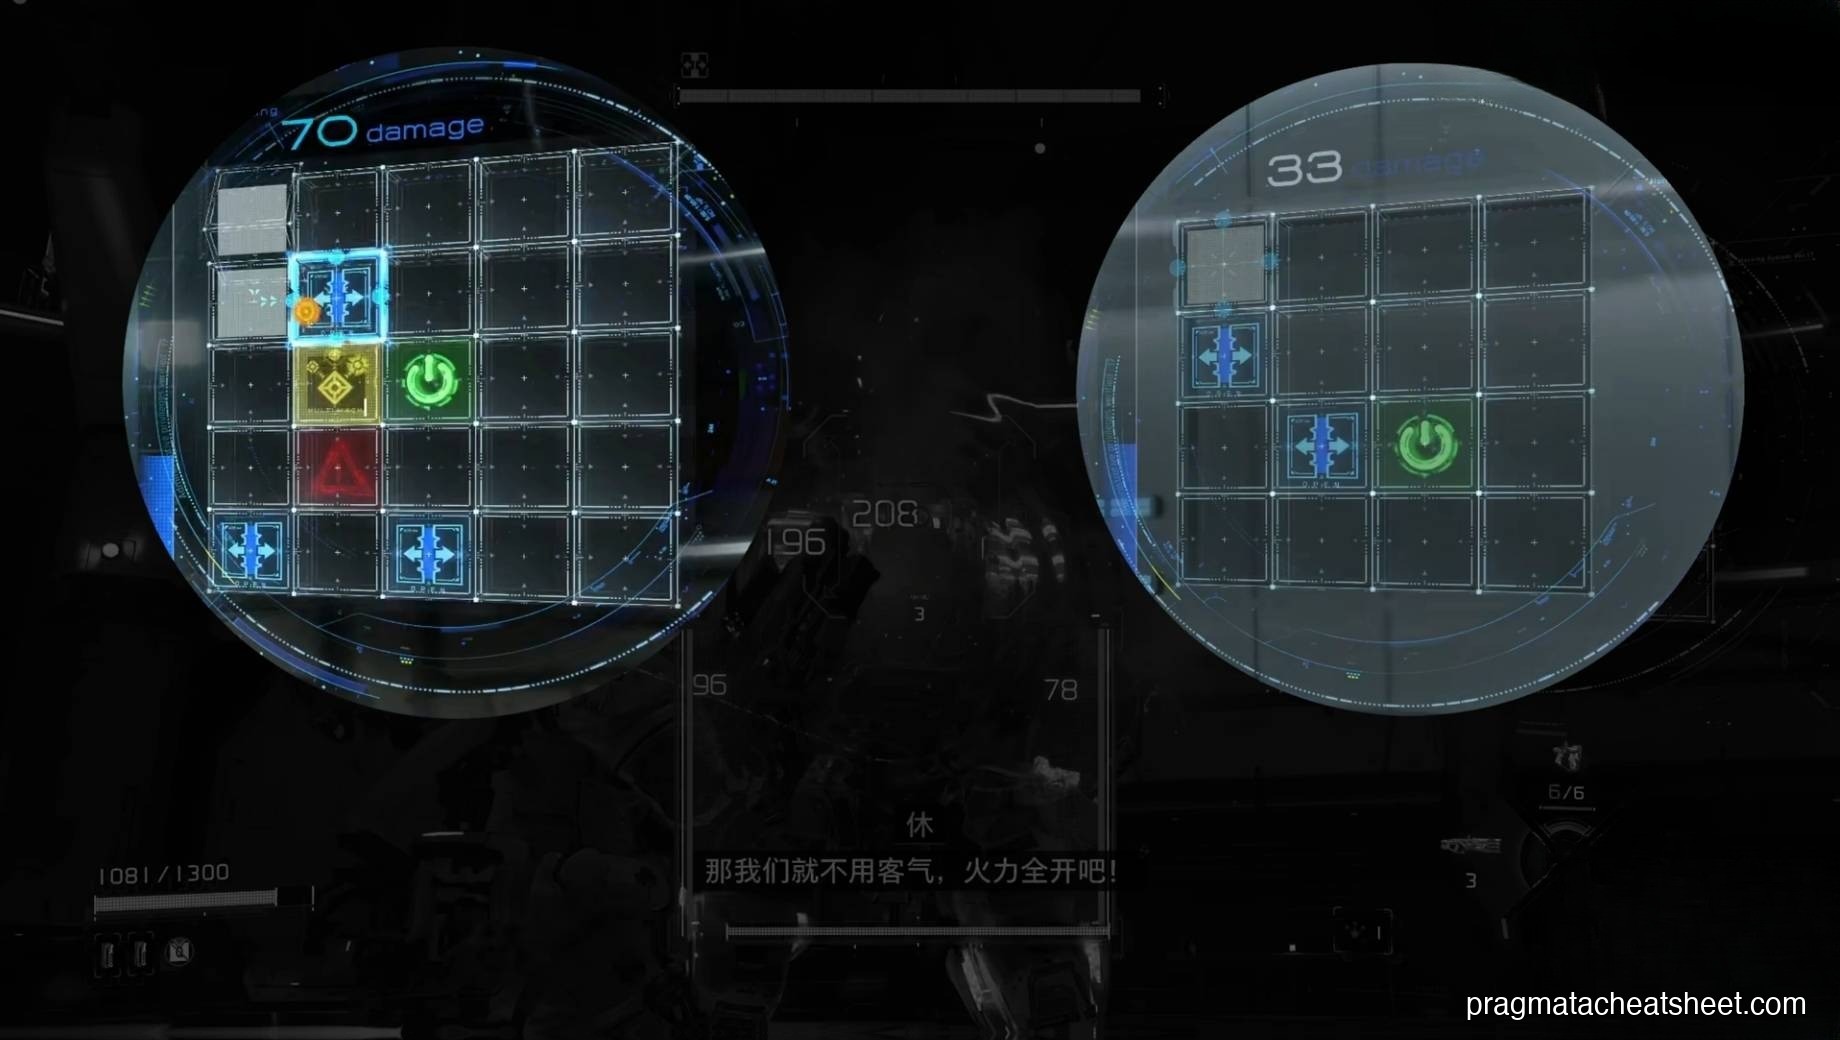
Aim down sights. A hacking grid overlays on the enemy and a cursor appears on your side. Drag the cursor from the blank entry square through connected cells to the Green Node. Touch the green node and the hack commits — the enemy collapses into OPEN State (big blue damage number), and every bullet you land during the window gets amplified (red numbers).
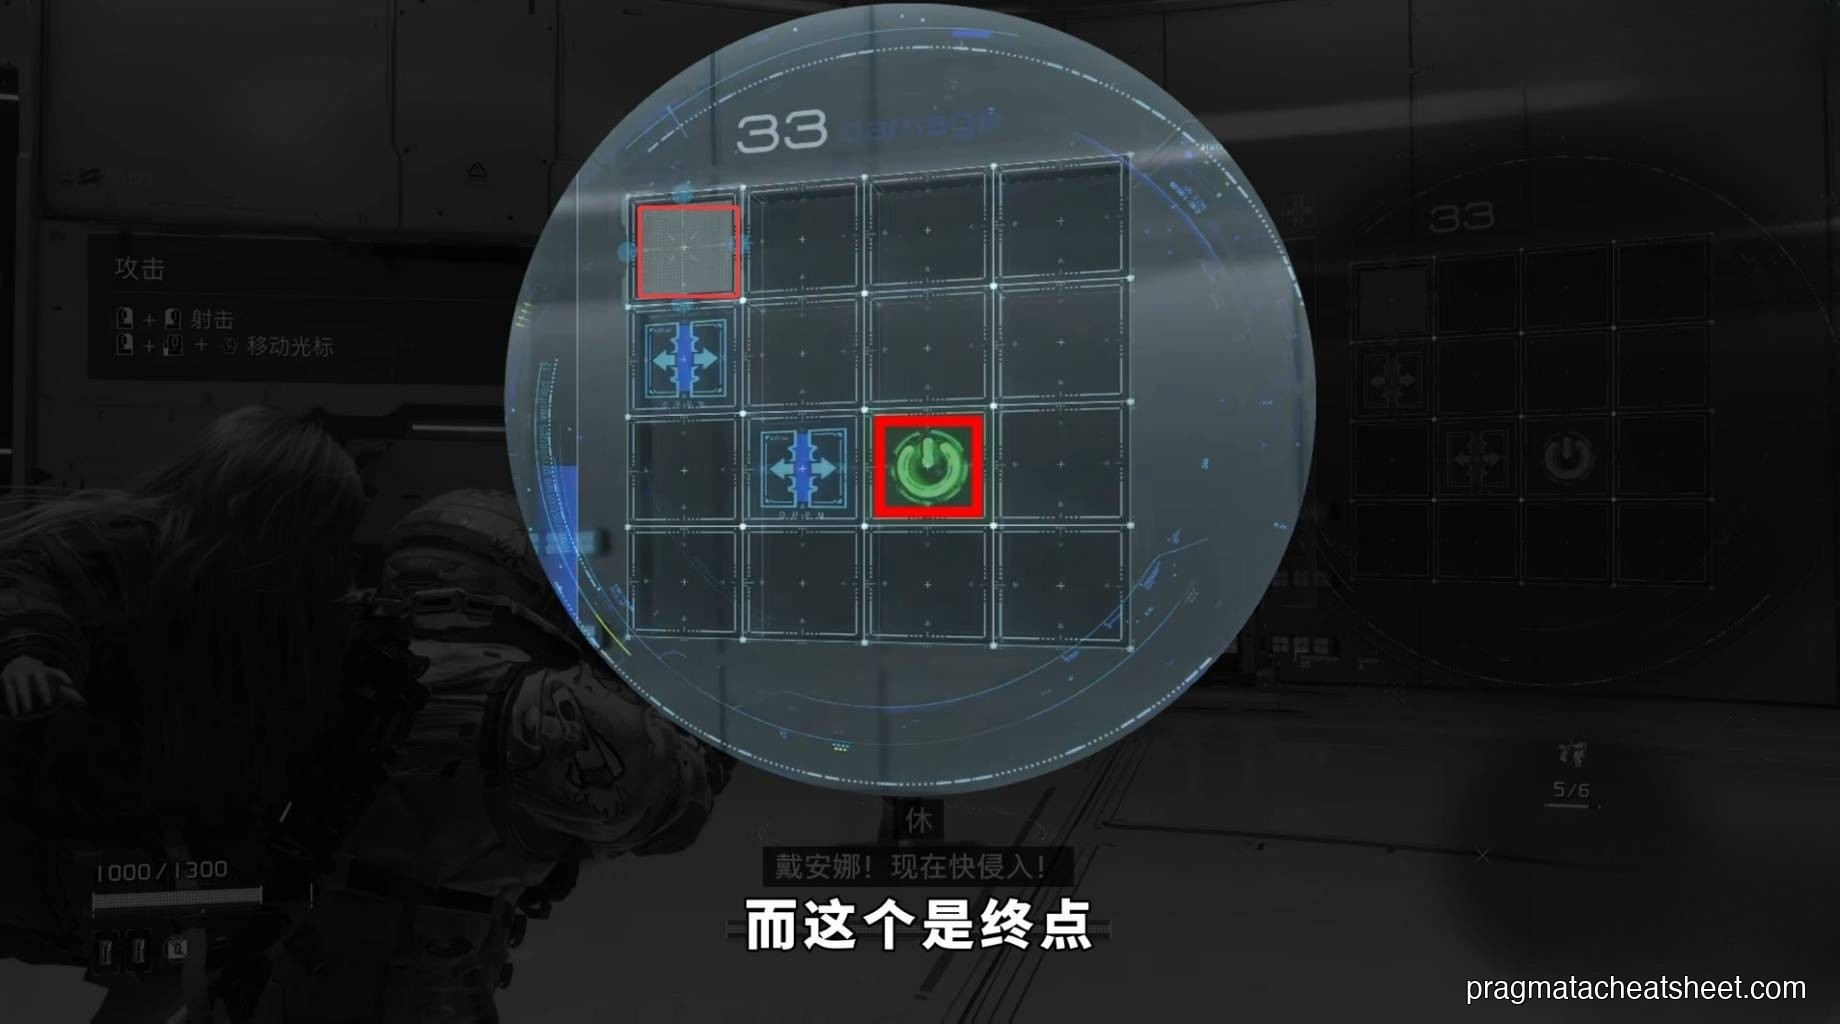
You do not want to rush the green node. You want to maximize what the grid gives you along the way.
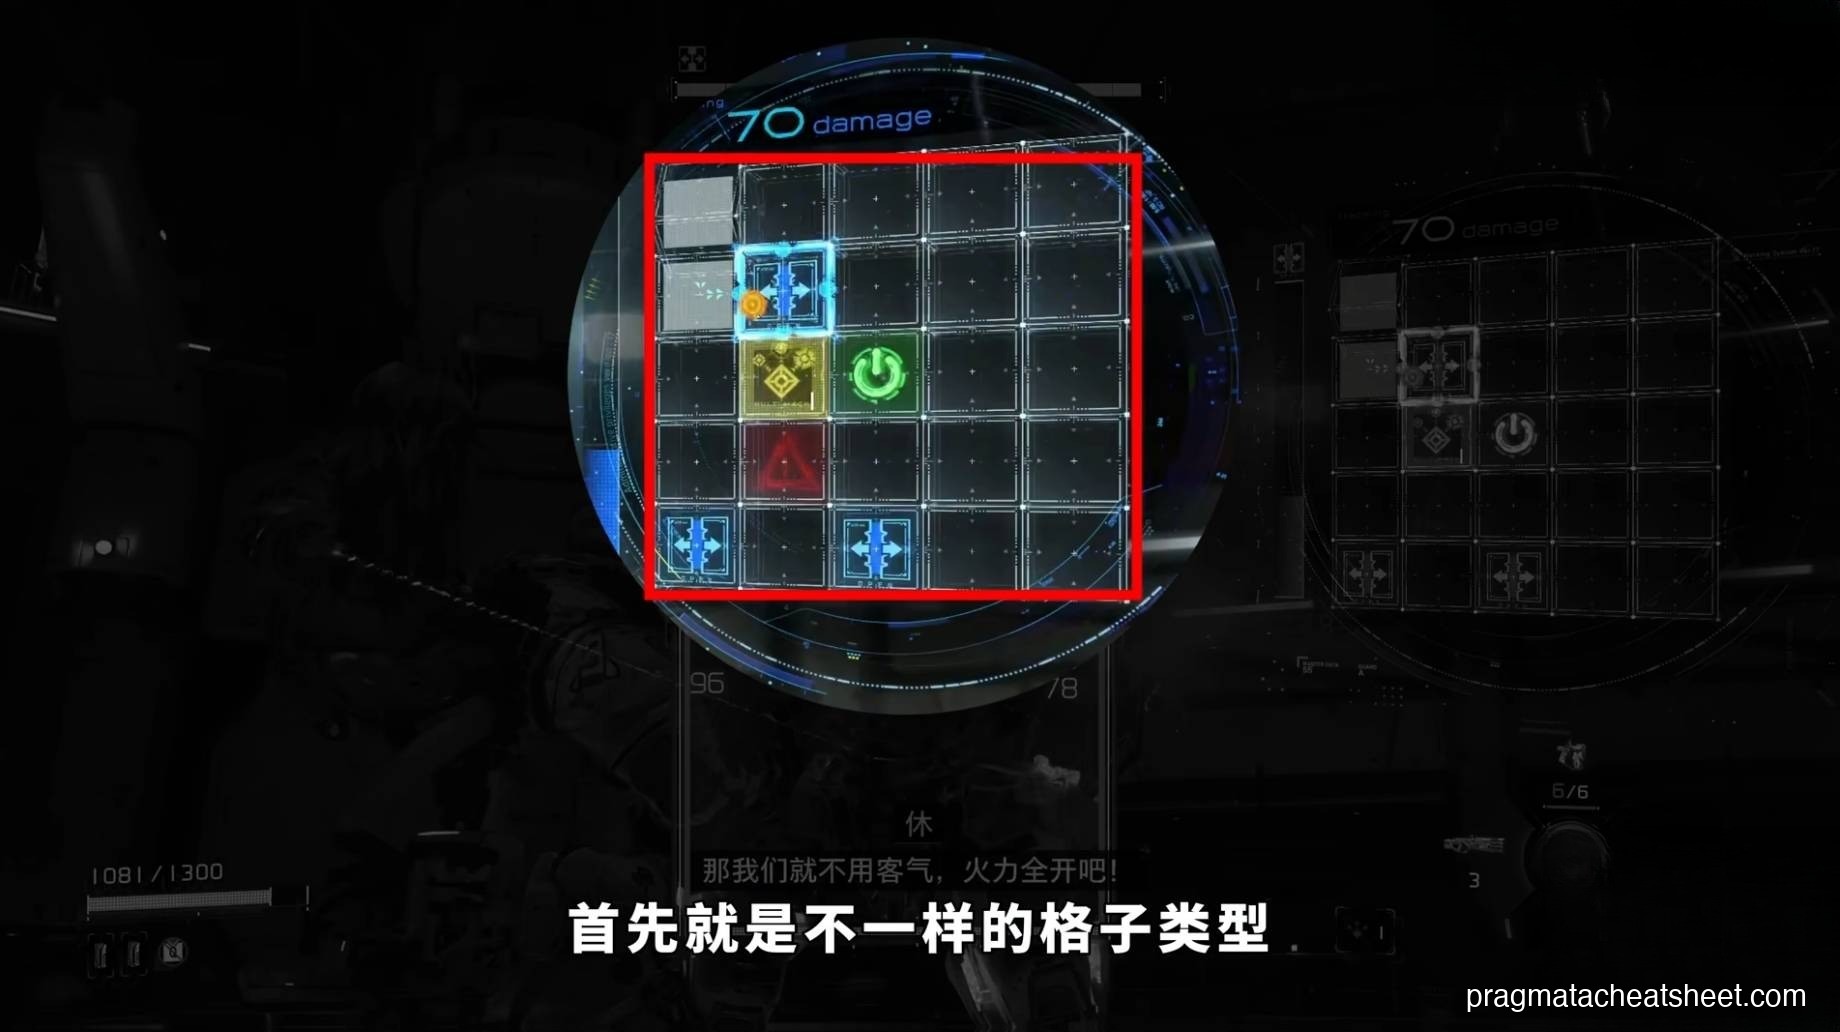
The Four Node Types
Blue Node — Damage Stack
The core currency. Every blue node you pass through on the way to the goal stacks hacking damage and lengthens the OPEN State window. A longer path through blue nodes almost always beats a short path.
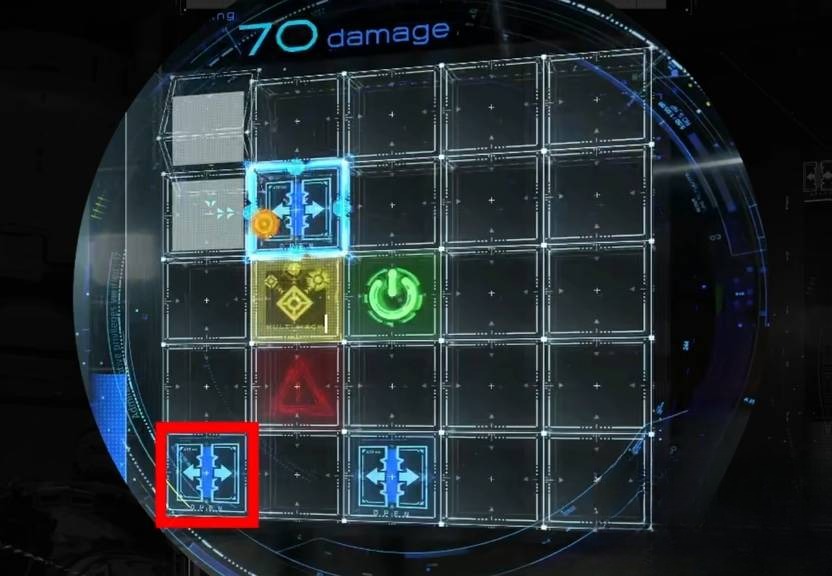
Rule of thumb: ignore the straight line. Trace the longest safe zig-zag through blue, then finish on green.
Green Node — Goal
Reaching the green node is what ends and commits the hack. You can only touch one. Touch it and the hack is over, even if more juice was on the board.
Yellow Hacking Node — Consumable Buffs
Yellow nodes convert a collected buff item into a timed amplifier — extra damage windows, slower enemy recovery, bigger crits, depending on the consumable. Limited ammo, so they're best saved for serious threats.
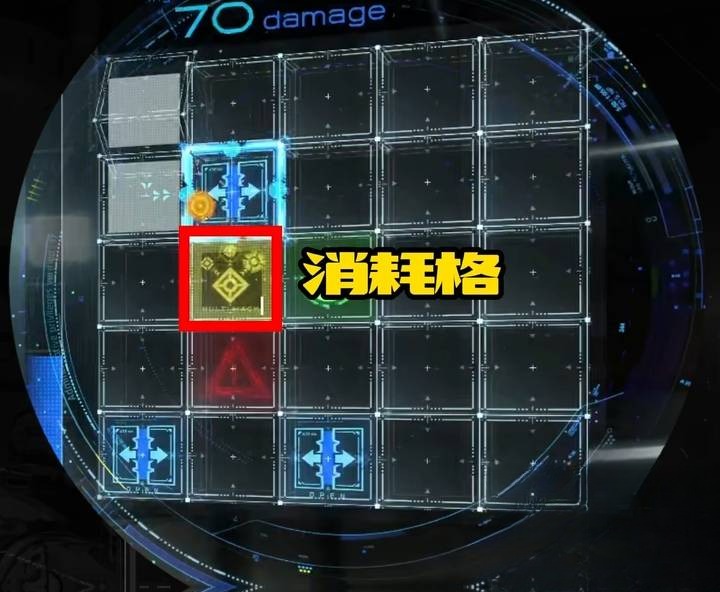
When to burn yellow: Sector Guards, the first pass on a phase-2 boss, Pure Lunum room spawns where one failed hack wastes a lot of ammo. Not on the three bots in a hallway.
Red Node — Cancel Trap
Touch a red (or gray blocker) node and the whole hack cancels. You lose the charge attempt, the OPEN State never fires, and you're staring down an unhacked enemy with your pants around your ankles.
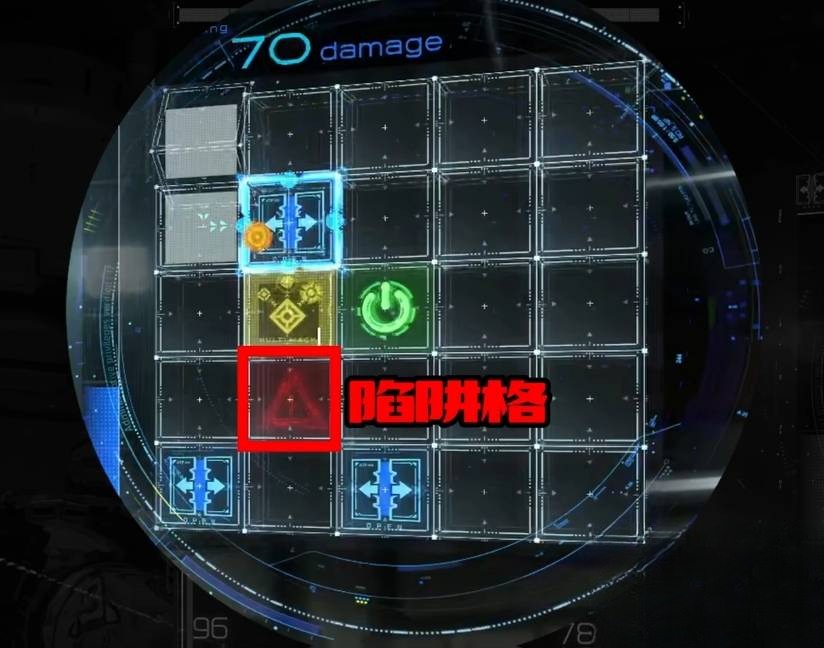
On bigger grids, red nodes are deliberately placed to tempt you into the fastest visible route. Slow down and scan the whole board for them before you start tracing.
Grid Size Tells You Enemy Priority
The grid panel scales with the target. A trash bot opens a 3×3. A Sector Guard or Shielded Bot opens a wall of squares with branches, multiple yellow nodes, and a couple of red traps.
Bigger board = bigger reward and bigger risk. Pay attention: if you're staring at a 6-wide grid with two yellows on it, that's your signal to slow the fight down, find cover, and commit to a clean route.
Overdrive Protocol — The Ultimate Hack
Diana has a meter that fills as you land hacks. When it's full, you can trigger Overdrive Protocol — her ultimate hack. Think of it as a "press to delete" on trash fights and a "stun the unstunnable" on bosses. The meter takes real investment to fill, so using Overdrive is a commitment.
How to think about it:
- On trash waves · don't waste Overdrive on regular bots. Save it.
- On Shielded Bots and red-armor enemies · Overdrive is how you skip the shield phase entirely and go straight to the weak point.
- On bosses · fill the meter before the fight (keep a save right before the arena), then open with Overdrive to drop the boss into OPEN State immediately and burn your best single-use weapon during the window.
Environmental & Auto-Hacks
Beyond enemies, Diana can hack environmental panels (doors, elevators, trams, red-locked rooms) and, later on, performs Auto-Hack — basic-level hacks trigger without manual input. That frees your attention for the grid battles that matter. Invest in the Auto-Hack skill early; it's a massive quality-of-life upgrade during exploration.
Tactical Habits That Actually Work
- Read the whole grid before you start tracing. The cursor follows your thumb, so committing to a line with no plan means you'll find the red node the hard way.
- Prioritize survivability over speed. If dodging back to cover costs you one attempt on a fast hack, that's still cheaper than a failed hack under fire.
- Chain blues, then snap to green. Your longest plausible blue path, ending on a clean green approach. Yellow if you can fit it on a priority target.
- Cancel and retry is legal. You can back out of a hack attempt without committing — use this on tricky grids where your first instinct looked wrong.
- Fire the real guns during OPEN State, not between. A Charge Piercer round fired outside OPEN State is a wasted ammo pickup. Time them.
The Hacking Grid in One Picture
Treat every encounter as three problems: "what's the grid?" → "what's the blue-rich path?" → "what am I shooting when OPEN State lands?" Hacking in Pragmata rewards planning, not reflexes.