The Garden Warden — officially a Large Bot class — is Terra Dome's gatekeeper. It's the first boss that really punishes passive play: it closes distance fast, the tail sweep has reach, and it drops laser curtains in Phase 2. Your best friend this fight is the Decoy Generator.
Fight Overview
The fight starts in the Terrarium at the top of Terra Dome. Two phases. Phase 1 is a ground brawl centered on tail-sweep reads and opening a hack window. Phase 2 sees it leap to a raised perch, spray laser columns, and throw bombs you can hack mid-air to send back. Clearing this unlocks the Tier-3 License Key and resets the Lunafilament regulator.
Preparation
- Recommended weapons: Shockwave Blaster for stagger damage, Charge Piercer for weak-point taps from mid-range
- Throwables to bring: Decoy Generator (huge here) and Stasis Net
- Heal reserve: 3× Repair Canister
- Before you walk in: farm the Terrarium trash to fill Diana's intrusion gauge — Phase 2 is a great Overdrive Protocol moment
- Shelter upgrades that matter: Shockwave Blaster range/damage mods, Decoy Generator cooldown reduction if you have it
Phase 1 — Reads and Tail Sweeps
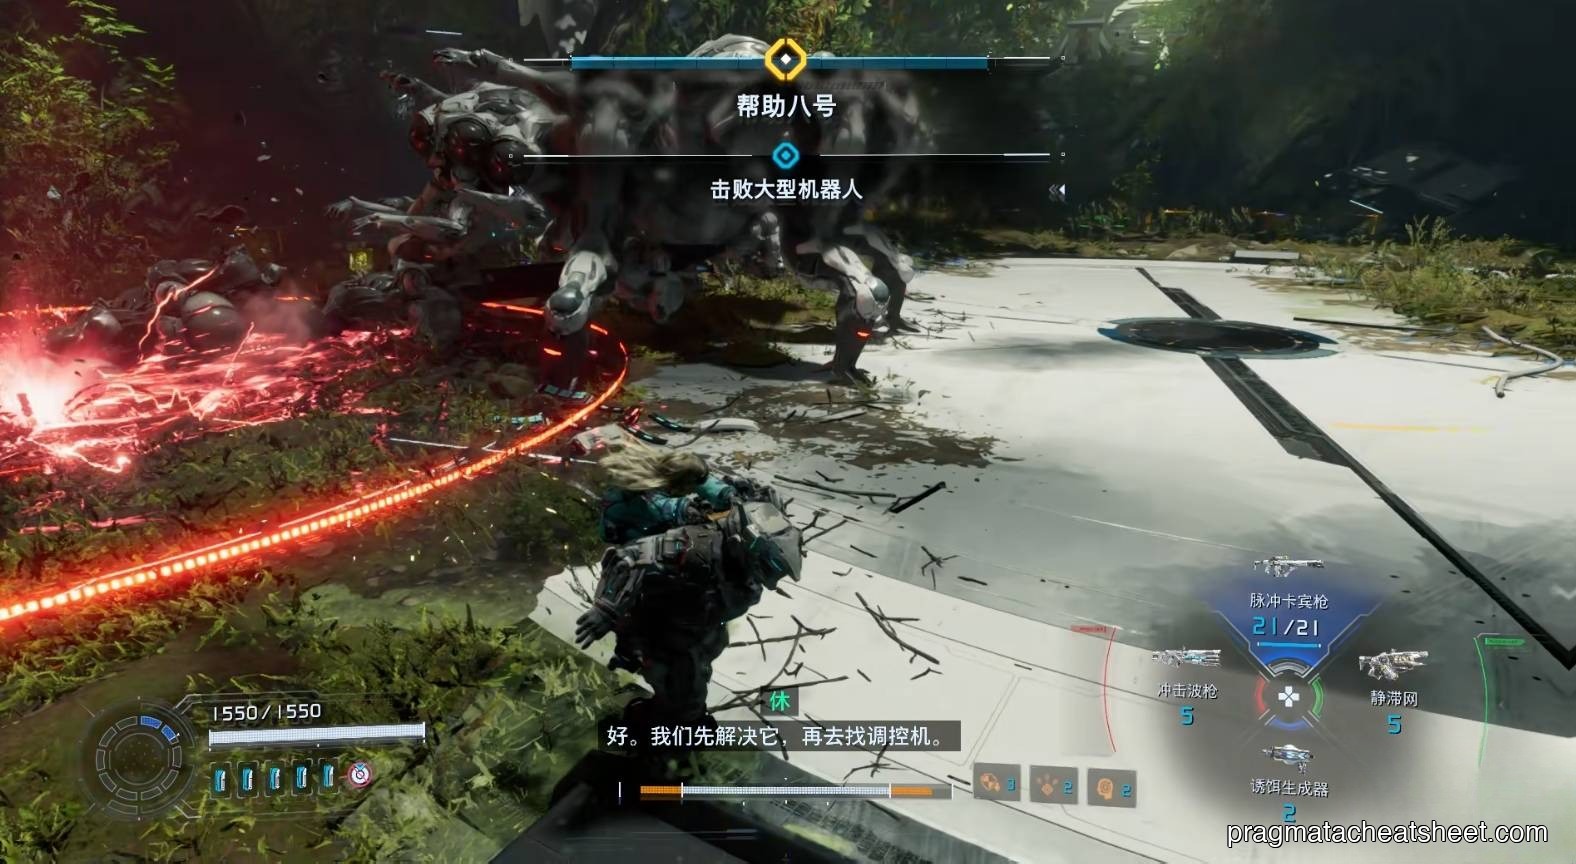
Opener is a charged plasma shot from its front. Side-dash it — don't back up, the recovery is too short.
Moves to watch
- Charge Shot — incoming plasma down a straight line; side-dash
- Tail Sweep — when both tail tips light up and swing forward, it's winding up a low sweep. Jump or back-dash out; crouching under it doesn't work.
- Pounce — quick forward leap when you're close; roll through the shoulder, not away

How to handle it
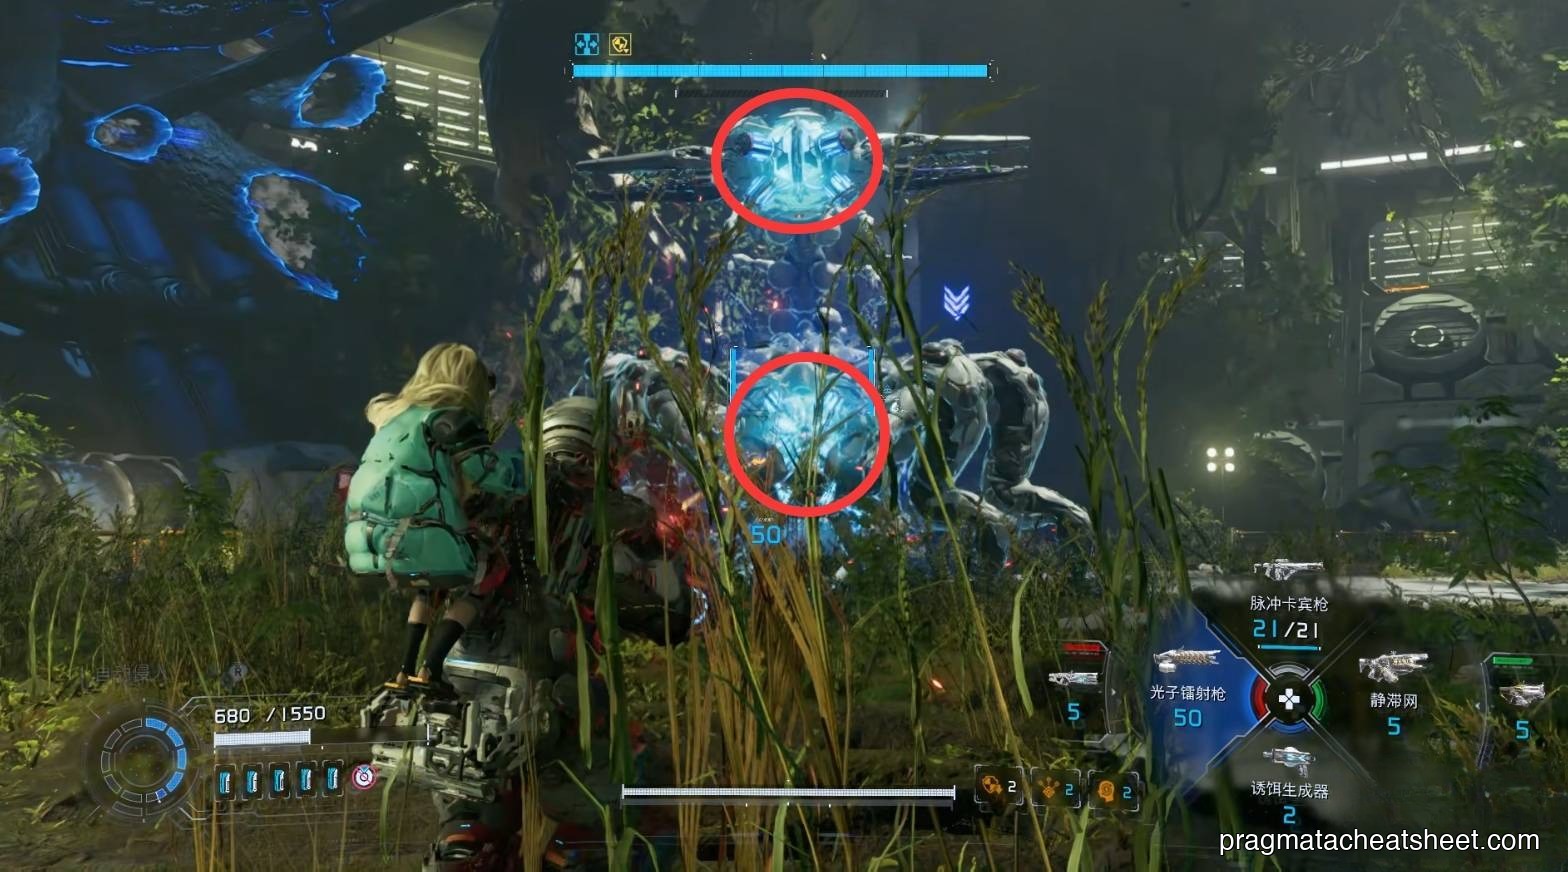
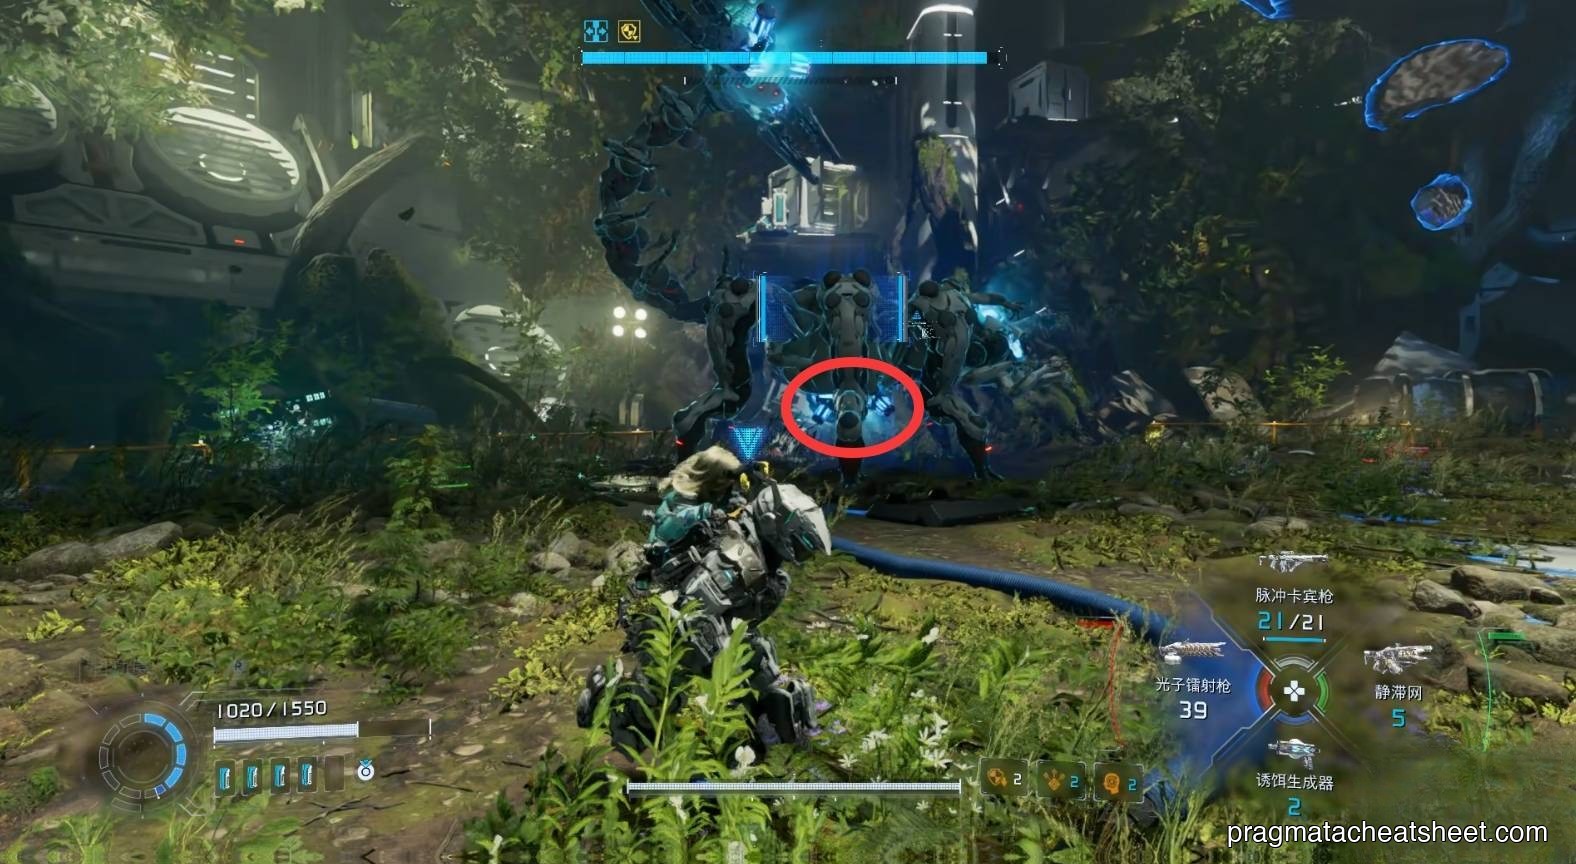
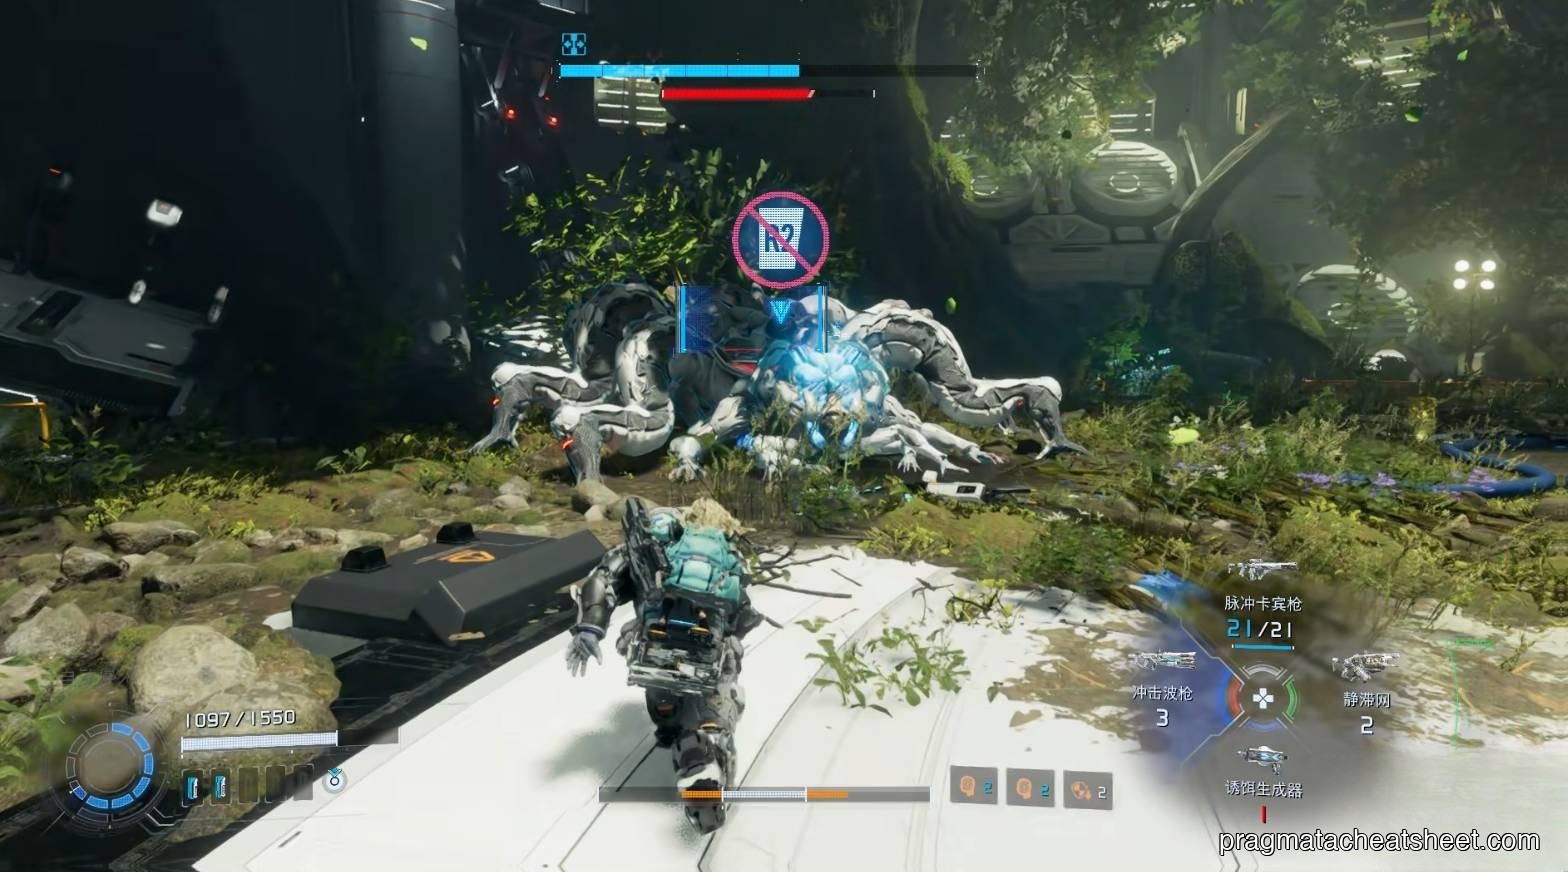
Hack, then hit the lit points.
- Post-hack, three weak points open: the head, the glowing tail tips, and a core on its underside. The tail tips are the cleanest shot — they stay visible during most animations.
- Drop a Decoy Generator before you open a hack panel. It pulls aggro for long enough to chain a full node path and land a weakpoint burst.
- Stasis Net is a panic button — save it for when the sweep and charge-shot overlap.
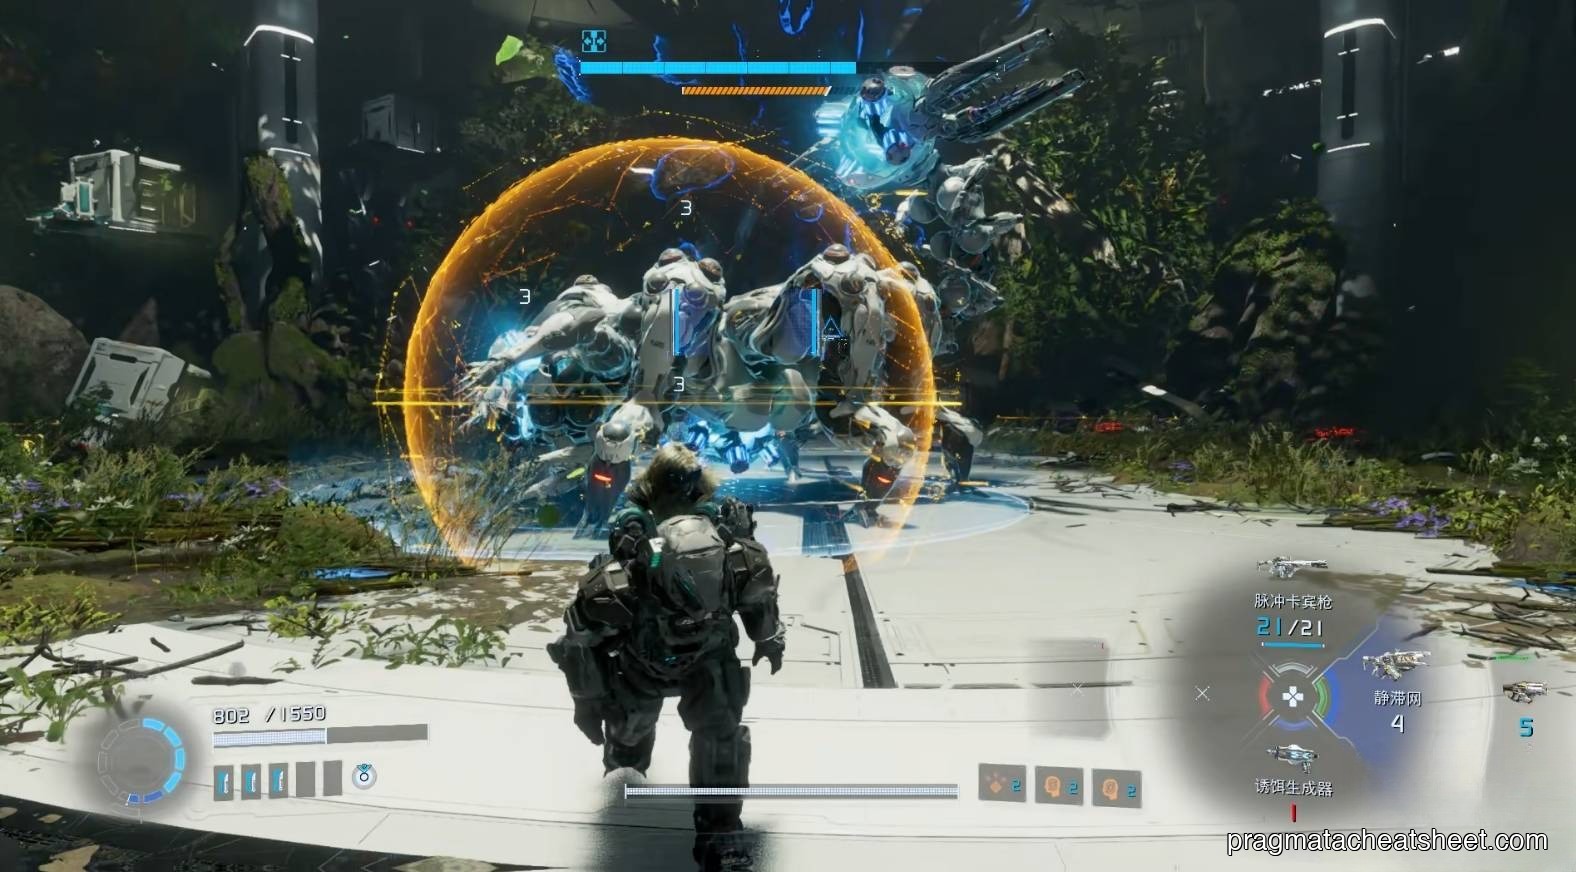
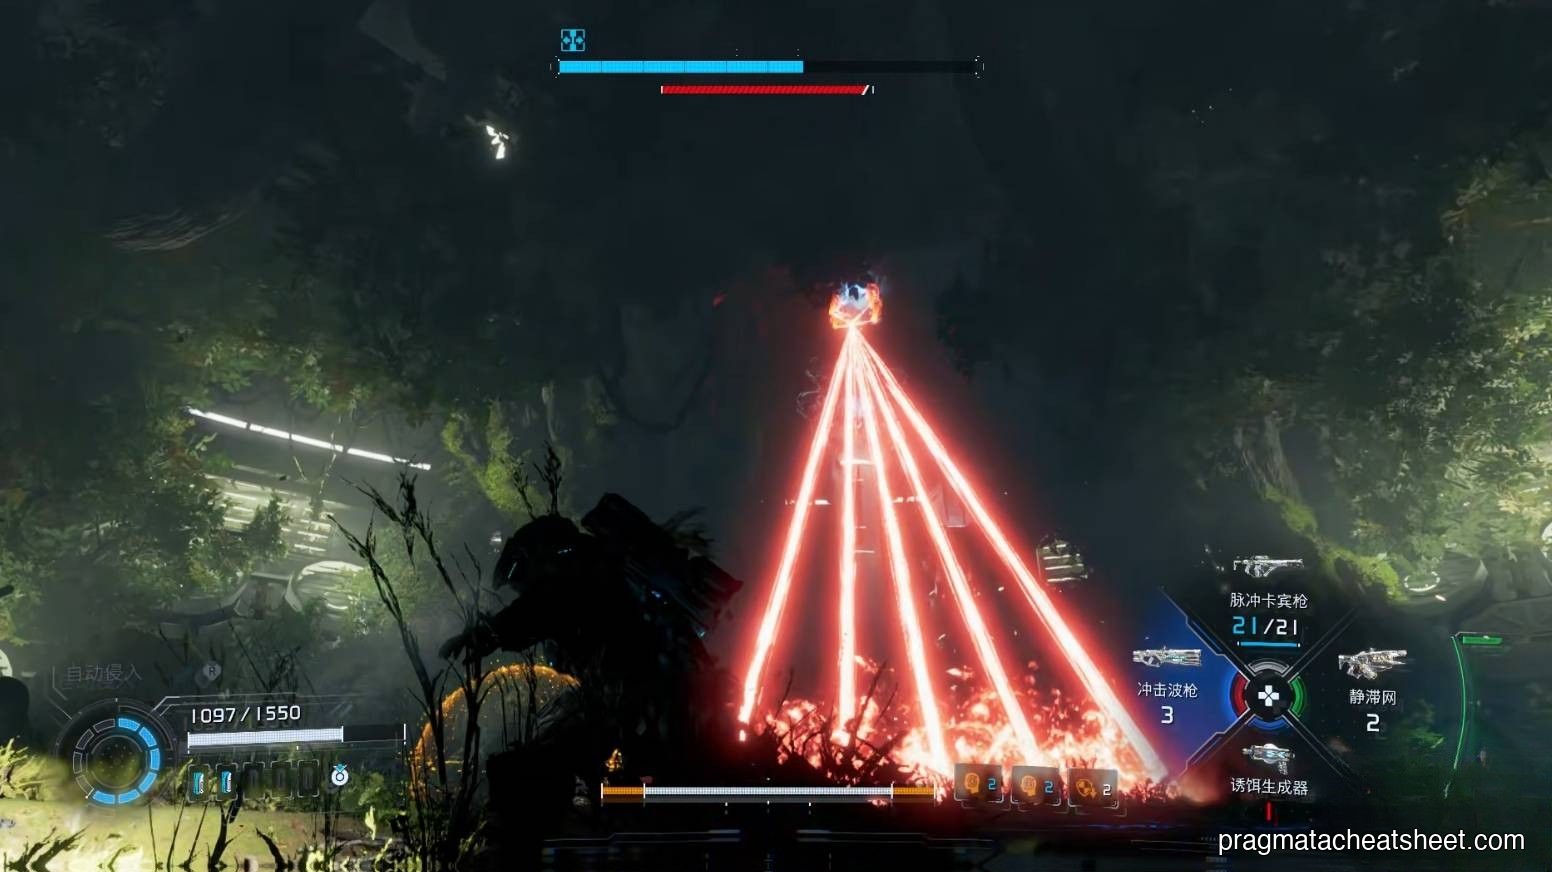
Phase 2 — The Perch
Around the halfway mark it leaps up onto an elevated perch and starts spraying ranged attacks. You stay on the floor and weave.
What to do
- Laser columns sweep the floor in a fixed pattern — thread the gaps between beams, don't try to outrun them from the side.
- Bombs arc in after the lasers. Aim a hack at the bomb mid-air — a successful hack turns it around and sends it back into the Warden. This is the phase's biggest damage window.
- If it leaps back to the ground, re-apply Decoy + Stasis and resume the Phase 1 loop.
Execute
When its HP drops low enough, it staggers to the floor with an execute prompt. Close the gap and finish it — the animation covers the attack animation of anything else on-screen.
Common Mistakes
- Trying to out-range the tail sweep. Its hitbox is longer than it looks. Jump it.
- Ignoring the bombs in Phase 2. Every bomb you hack is damage you didn't have to deal yourself. Prioritize the hack reticle.
- Standing still while casting a Decoy. The Decoy pulls aggro from where you throw it — throw it ahead of you, then reposition behind the boss, don't plant your feet.
- Saving Overdrive for Phase 2's laser mode. Laser mode is a dodge check, not a DPS check. Spend Overdrive on a Phase 1 hack window instead.
Reward
- Tier-3 License Key — full Shelter tier unlock
- Upgrade Components
- The Lunafilament regulator resets here — re-enables progress toward Red Zone cleanup
- An Escape Hatch appears on your next visit
- Back at the Shelter, a new Cabin Stamp Club board opens that eventually trades into Red Gate Keys and the Code Generator weapon
Next
→ Continue the story: Sector 4 · Lunum Mines → Next boss: Luna Digger