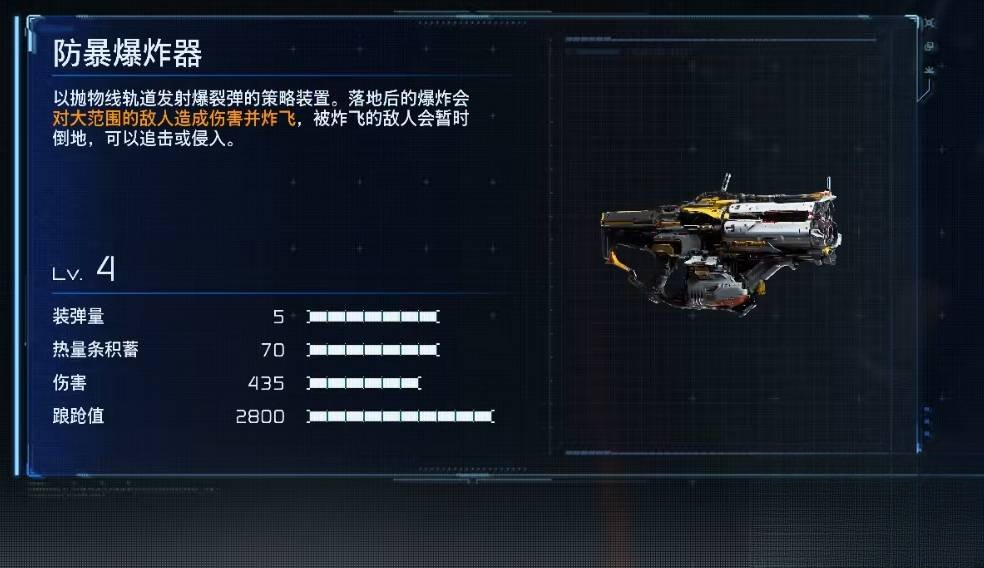
Mass Production Array throws groups at you. The Riot Blaster is the room-clearing answer that keeps your hack uptime alive.
Overview
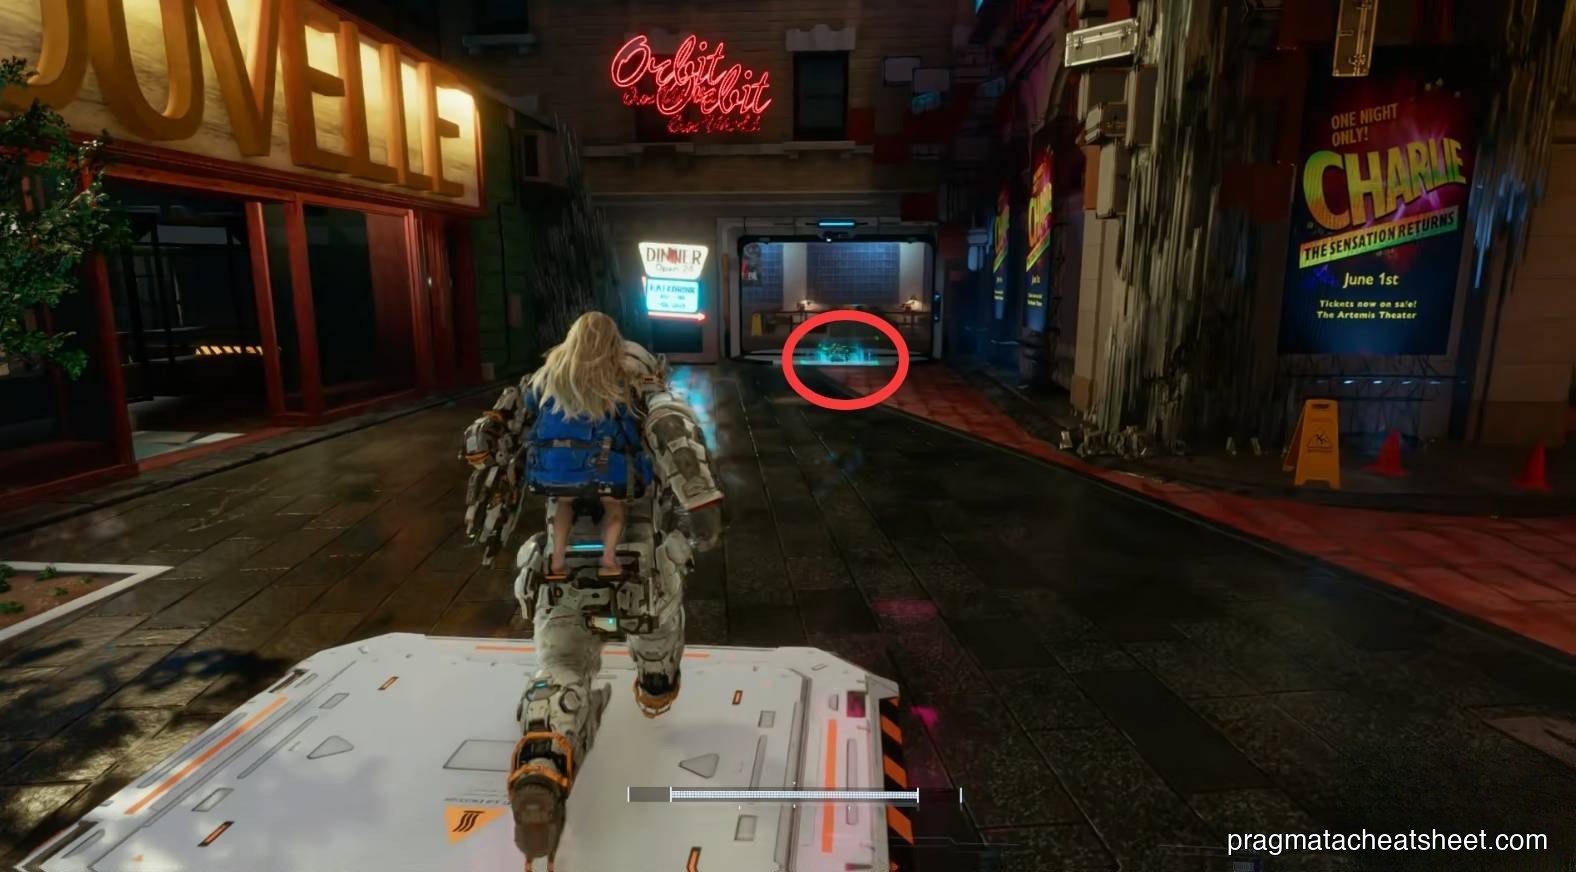
You'll find the Riot Blaster in Sector 2 · Mass Production Array — 02 Shopping District, on the main shopping-street route past the Escape Hatch and the red zone. It's a spread-shot tactical weapon — less precise than a Primary, but perfect for sweeping clusters.
How it Works
- Fire mode — Spread shot / scatter burst.
- Range — Short to mid. Think room-wide, not corridor-long.
- OPEN interaction — Flushes out packed enemies, exposing several OPEN targets for your Primary.
Strengths
- Excellent against grouped trash
- Stagger spreads across multiple targets — gives you breathing room when swarmed
- Cheap to fire relative to the damage it outputs on a group
Weaknesses
- Single-target damage is underwhelming
- Spread means a lot of the shot misses at range
- Doesn't replace a real Attack weapon in a boss fight
When to use / pair with
- Best in: Sector 2's dense Mass Production rooms, swarm waves, any fight with three or more light bots on screen.
- Pair with: Pulse Carbine to follow up on the lone remaining tough bot, or Stasis Net to freeze-and-spread for free damage.
Upgrade Notes
Stagger and spread tightness over raw damage — this tool earns its slot by controlling fights, not winning them alone.
Next
→ Back to Weapons