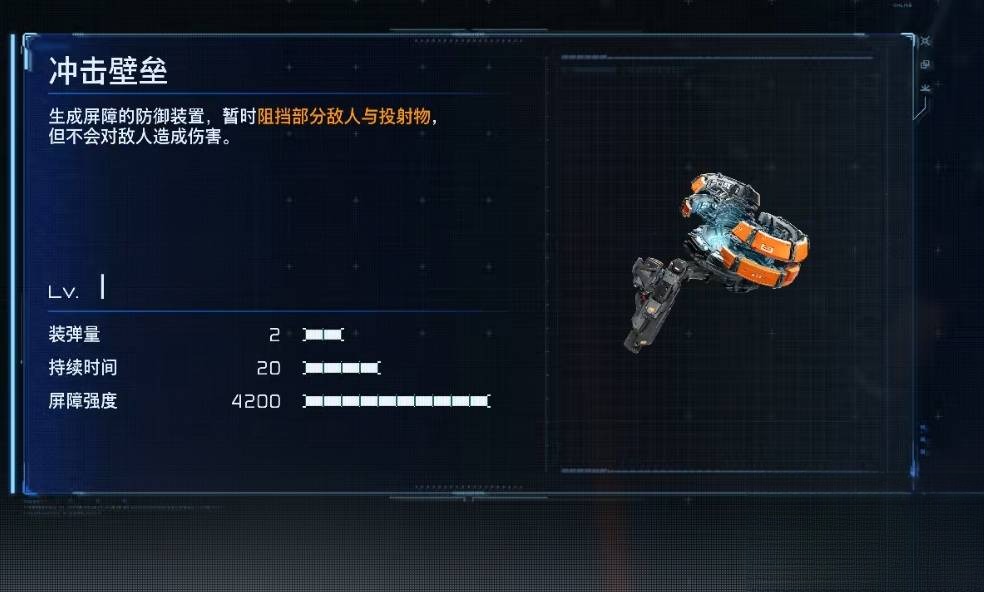
The Impact Barrier is a deployable wall — instant cover when the arena doesn't have any.
Overview
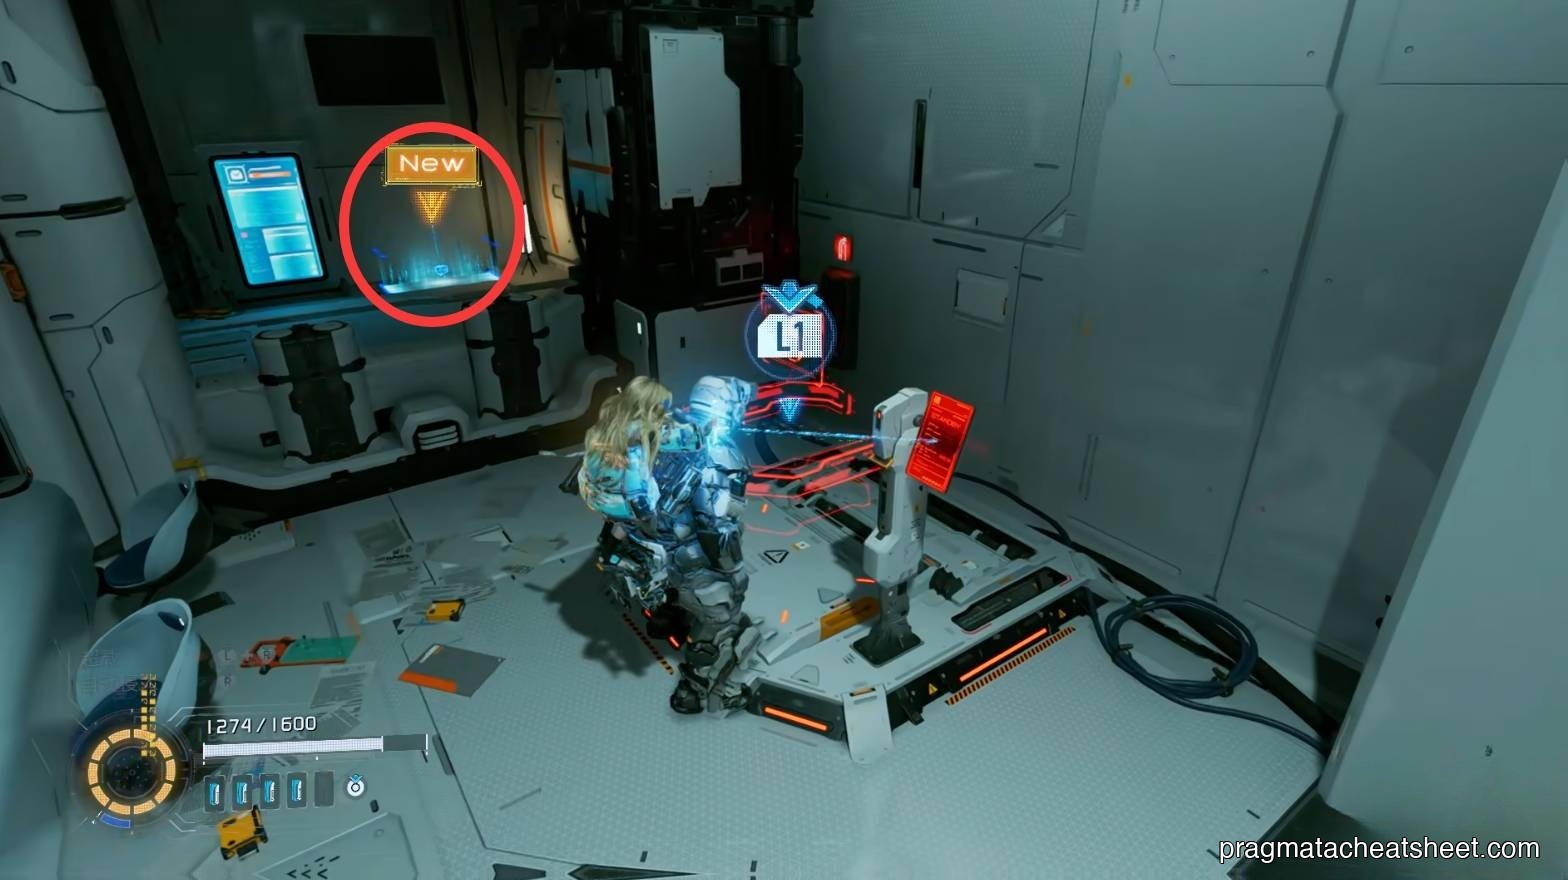
You'll grab the Impact Barrier in Sector 4 · Lunum Mines — 02 Crane Area, right next to the Escape Hatch. Lunum Mines is where Pragmata starts sniping at you from long ranges, and this tool is the game's answer.
How it Works
- Fire mode — Drop a barrier in front of you.
- Range — Short — the barrier lands near where you're standing.
- OPEN interaction — Doesn't open enemies, but protects you through the hack window so you can finish the chain without interruption.
Strengths
- The single best answer to ranged bot pressure
- Safe hacking on the move — drop, hack behind it, move on
- Pairs with any Primary / Attack loadout without conflicting
Weaknesses
- The barrier has HP; sustained fire will chew it down
- Doesn't do damage — it's purely defensive
- Wrong tool for close-range brawls
When to use / pair with
- Best in: Lunum Mines, sniper lanes, any long-sightline arena, boss phases with artillery patterns.
- Pair with: Photon Laser or Charge Piercer — stay static, beam from cover, win the trade.
Upgrade Notes
Barrier HP and duration first. The barrier's job is to survive — make it survive longer.
Next
→ Back to Weapons